|
|
The features on this page require a GENESIS64 Advanced license and are not available with GENESIS64 Basic SCADA . |

![]()
|
|
The features on this page require a GENESIS64 Advanced license and are not available with GENESIS64 Basic SCADA . |
![]()
Go to https://app.sendinblue.com/account/register and signup for a Sendinblue account. Once you verify your account (Sendinblue will send you an email verification link), you can choose different packages based on your requirements. Go to https://account.sendinblue.com/advanced/api/ click on ‘Create a new API Key’. Copy the API Key generated. We will need this in step 4.
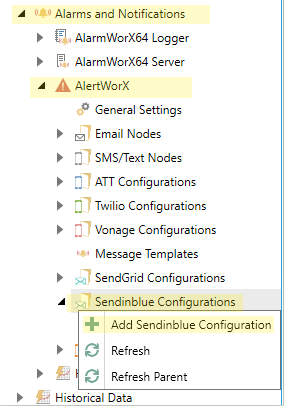
1. Go to Alarms and Notifications>AlertWorX>Sendinblue Configurations. Right Click and choose Add Sendinblue Configuration
2. Check the “Is Default Configuration” box at the top to set the configuration as default.
3. Add a Description (Optional)
4. Copy the initially created API Key to the API Key field.
5. Set up the From e-mail address. You may also use a different ‘Reply To’ email address if required by checking the ‘Reply To‘ checkbox and providing the Reply To email id.
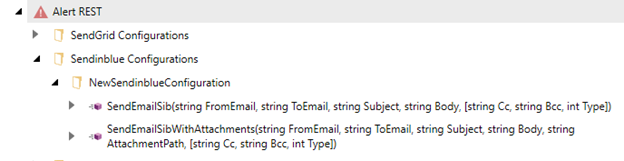
6. Apply the changes. Now in the Data Browser you can see the methods supported by Sendinblue
7. Once the configuration is set and applied, you can use the ‘Test Email’ Button in the form to test that a message gets sent successfully. To address, Subject, Message along with optional fields Cc, Bcc, Attachment Path, etc. can be set in the ‘Send a test message’ popup dialogue. You can add multiple recipients using ‘;’ delimiter. You can also mention the name of the recipient with a ‘,’ delimiter. For eg: ‘user1@domain.com,User1Name;user2@domain.com, User2Name’ This is possible in To, Cc and Bcc fields.
Multiple attachments are also supported (up to 10) by use of a ‘;’ de-limiter. The service should have permission to access the file and if any one of the attachments cannot be attached by process, the email will not get sent. The whole file name should be present for identifying the
file type.
To add or remove a user to unsubscribe list, go-to https://app-smtp.sendinblue.com/block and you can add/remove the contact there.
See Also: