![]()
![]()
Before using the Hyper Historian for the first time, you should use the System Settings form to change:
the Logging Server Storage Path (IMPORTANT: This is a required setting that must be done first in your Hyper Historian configuration database)
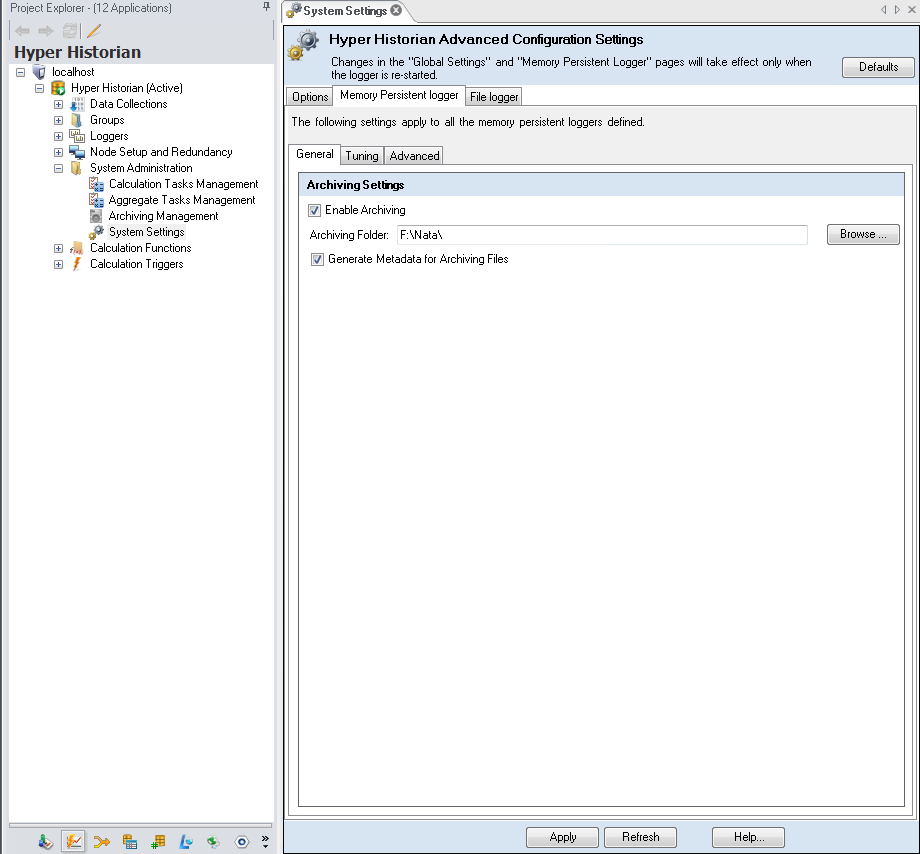
the Archive Settings
Disk Space Management
To open this form, in the Workbench make sure the Hyper Historian provider is selected and then:
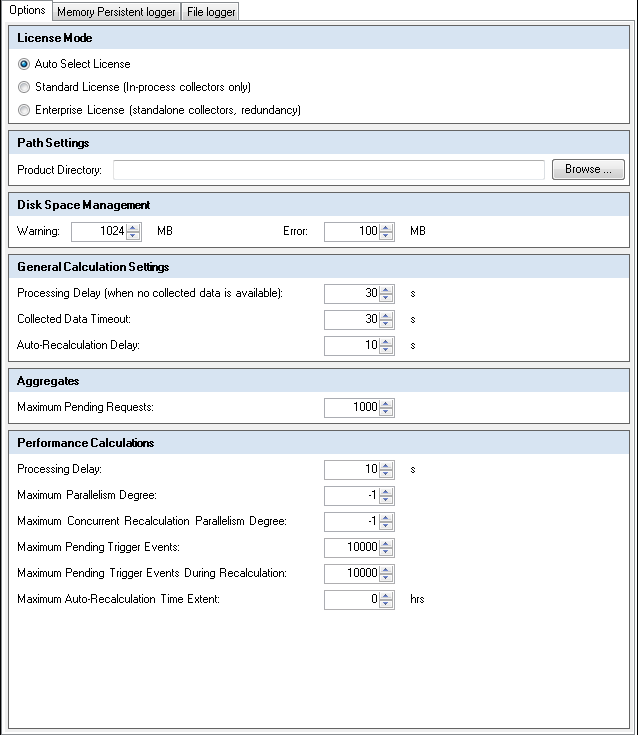
On the Options sub-tab, in the Disk Space Management section you can specify the amount of disk space remaining (in megabytes) at which you want Hyper Historian to warn you and display an error message when disk space becomes exceedingly low. When you receive an error message, the Data Logger stops logging. Other settings on this tab are described in the Performance Settings for Hyper Historian topic.
Go to the Memory Persistent Logger tab; make sure you're on the General sub-tab.
The Archive Settings tell the Hyper Historian whether or not it should automatically detach older data from the system, and if it is to remove the old data, and where it should store the removed data (in a folder location). For more information, refer to the Archive Settings topic.
The Logger Server Storage Path (under Storage Settings) is the location where the Hyper Historian stores the plant data it collects. The default folder for the Logging Server storage path is:
C:\Program Files\ICONICS\GENESIS64\Components\HHLogger\BaseLogger.1\Data Folder
It is important to change this default path, especially if the C: drive has a low amount of available storage space. To change the default path, click the Browse button to set your desired Logging Server Storage Path. It is also important to set the Disk Space Management settings. With these settings, you are able to set: the amount of disk space remaining (in megabytes) before you receive a warning and before you receive an error message.
Settings on the Tuning and Advanced sub-tabs of the General tab and each of the sub-tabs of the File Logger tab are described in the Advanced Configuration Settings topic.
See also: