![]()
![]()
The AlarmWorX64 Logger provides a permanent copy of alarm and event notifications produced by any OPC UA/OPC AE Alarm and Events server, including the AlarmWorX64 Server. AlarmWorX64 Logger can store alarm data to a Microsoft SQL Server database for later replay.
The alarm and event data are stored in a SQL Server database that is created and configured in the same manner as the other supporting GENESIS64 databases. The logger is configured within the Workbench where the logger service can be stopped or started.
The default configuration database that ships with the product is ready to be used. It shows you all the names of the columns that will appear in the log database. It already has a subscription to the Alarms server and the GenEvent server and it even requests additional alarm attributes.
The AlarmWorX64 Logger is configured using Workbench, a centralized project management application for GENESIS64. If the AlarmWorX64 Logger includes the sample configuration, it can work “out of the box” without any further customization.
Let’s take a look at the configuration.
Open Workbench.
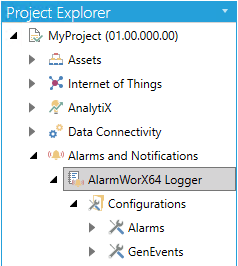
In the Project Explorer, expand Alarms and Notifications > AlarmWorX64 Logger > Configurations.
By default, there are two configurations already configured; one is for alarms and the other is for events.
AlarmWorX64 Logger in the Project Explorer
Expand the Alarms and GenEvents configurations in the tree. The items under each configuration are the Columns that have been configured to log. For each alarm or event that is logged by the AlarmWorX64 Logger, the information for these columns will be recorded.
NOTE: Since AlarmWorX64 Logger works out of the box, you do not need to change anything. However, you can change the default configurations to suit your needs, or you can create new configurations.
Double-click on Alarms to edit the configuration.
The Alarm Subscription tab is where the alarm or event subscription is declared. To add a new alarm subscription, add a new item to the Alarm Subscription list, then select the browse  button to open the Data Browser and browse for your desired alarm or event server.
The sample configuration we default the logging database to be the configuration database. It is highly recommended to use a separate logging database using these steps:
Go to the Storage tab.
Select Use a custom database for logging.
Select Configure connection.
Select the settings for your SQL Server.
In the Database field, select an existing database created for this purpose, or type the name of a database you would like to create at this time.
Select Next.
If you are creating a new database, a confirmation message will appear. Select OK.
Select Finish.
When the database has been created, the Connection String field should be filled with the connection information. Select Apply.
When you are done making any further optional customizations, make sure to apply any changes, then start the service by selecting the traffic light in the Home ribbon.
To ensure that the logger remains running even after the machine is restarted:
Bring up the context menu for your project in the Project Explorer.
Select Configure Services.
For the ICONICS AlarmWorX64 Logger service, set the Start Mode to Auto or Auto (Delayed).
For more information on configuring AlarmWorX64 Logger such as how to use printer logging, table management, event filtering, or redundancy, please refer to the Help files or other application notes.
See Also: