|
|
The features on this page require an add-on to work with GENESIS64 Basic SCADA. |
|
|
The features on this page require an add-on to work with GENESIS64 Basic SCADA. |
To Explore a Network
Open the Workbench and expand your project within the Project Explorer. Expand the SNMP provider node and then the Networks branch. Right-click on a selected Network, then click on Explore Network, as shown below.
Explore Network from Project Explorer

OR
Select your preferred Network in the Project Explorer then click on the Explore Network button, shown below, in the Tools section of the Home ribbon in the Workbench.
Explore Network Button

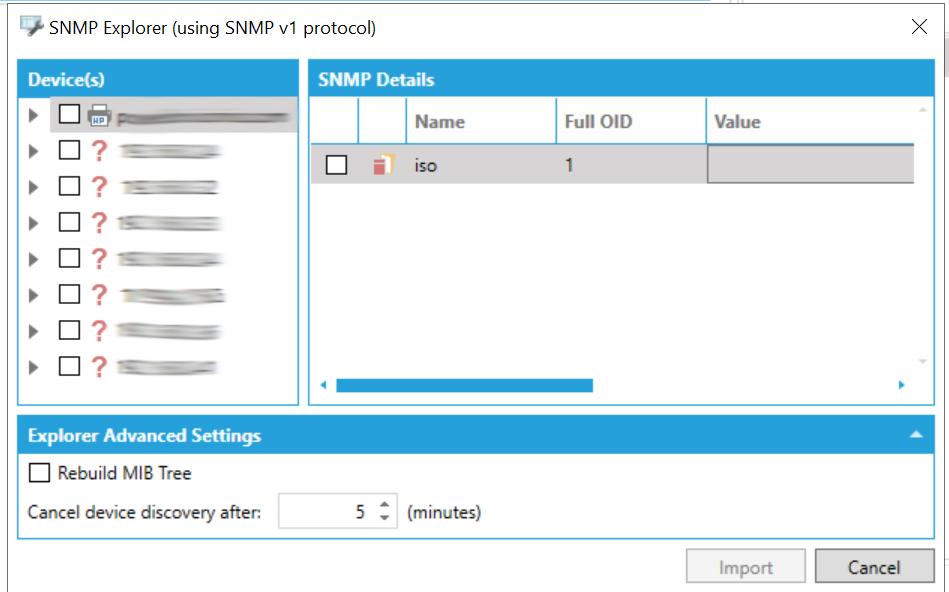
This opens the SNMP Explorer, as shown below. The window will also show the SNMP Version protocol (either SNMP v1 or SNMP v2) that you selected in the Networks properties. The Devices shown will be based on the Discovery Settings set in the Networks properties.
SNMP Explorer

Device(s)
This section of the SNMP Explorer will display the discovered devices found according to the Discovery Settings set in the Networks properties. These can be shown as either device names or IP addresses. Some listed items will allow you to drill down to nested details. You can then click on the checkboxes to the left of the listed Devices for any that you would like to Import.
SNMP Details
This section of the SNMP Explorer will show details for any selected devices, including an additional checkbox to set status for Import, an icon for the selected device, Name, Full OID, Value, Syntax, Access, and Description.
Explorer Advanced Settings
Rebuild MIB Tree - Check this box to rebuild the Management Information Base (MIB) tree structure for object IDs.
Cancel device discovery after: - Enter a time (in minutes) in the text entry field (or use the up/down arrow keys) after which device discovery should be cancelled.
Once you have selected your intended devices in either the Device(s) or SNMP Details sections of the SNMP Explorer window, you can click on the Import button to start the process. You can monitor the import process in the Recent Tasks section of the Workbench (tab is in the lower right of the window). Once the import process is complete, the successfully imported devices will appear in the Workbench's Project Explorer when you expand your selected Network.
See Also: