|
|
The features on this page require an add-on to work with GENESIS64 Basic SCADA. |

![]()
|
|
The features on this page require an add-on to work with GENESIS64 Basic SCADA. |
![]()
The Images sub-branch underneath the Configuration branch of the MobileHMI provider Project Explorer allows users to create and utilize a image files that can be utilized within the Layout and Tile (Icon) properties.
To Configure Images:
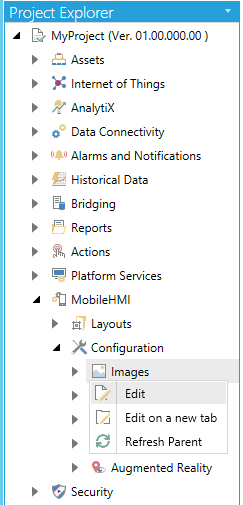
Expand the MobileHMI branch within the Project Explorer. Click on the Images sub-branch beneath the Configuration branch of the MobileHMI provider Project Explorer. This should automatically open the Images properties window in the right side of the Workbench window. You can also right-click on the Images sub-branch and select 'Edit' as shown below.
Selecting Edit from the MobileHMI Project Explorer
-OR-
You can also click on the Images sub-branch and then on the 'Edit' button in the Edit section of the Home ribbon at the top of the Workbench window.
Edit Button
![]()
This will open the Images properties window, as shown below.
Images Configuration Properties
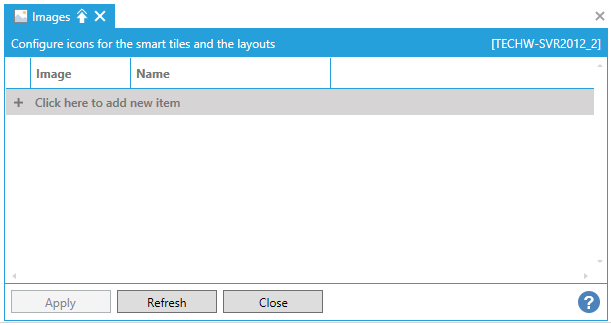
Click on 'Click here to add new item'. This section will become active and will resemble the following image.
Editable Section of the Images Properties Window

Click on the ellipsis button (![]() ). This will open a file browser, where you can navigate to your desired Image File (in either .jpg or .png format). Once selected, a thumbnail of your chosen image will appear to the left of the ellipsis within your active row and within the Image column, as shown below. Once the image is added, you can then Clear it if you would like to replace it.
). This will open a file browser, where you can navigate to your desired Image File (in either .jpg or .png format). Once selected, a thumbnail of your chosen image will appear to the left of the ellipsis within your active row and within the Image column, as shown below. Once the image is added, you can then Clear it if you would like to replace it.
Image Added

You must now provide a Name for your image in the text entry field within the Name column.
Once you have finished entering your images, click on the Apply button, then Close button to close this window and return to the Workbench window.
You can then utilize your newly added images within the Icon pulldown menu in the General Properties section of a Layout or within the Icon tab within Tile Properties.
See Also: