![]()
![]()
A data item is an instance of a data source with parameters already set. This gives you a way to assign a user-friendly name to customized data sources and use them without having to specify the parameter values.
To Create a Data Item:
Open the Workbench. Expand your project folder, then the Data Connectivity node, then the Databases node.
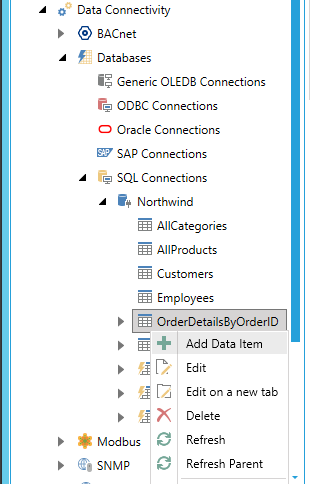
Expand your selected data connection and data source nodes. For instance, in the example below, we are adding a Data Item to a Data Source within the Northwind database found within the SQL Connections node. Right-click a Data Source, then select Add Data Item, as shown below.
Add Data Item
-OR-
Select your data source then click on the Add Data Item button in the Edit section of the Home ribbon, as shown below.
Add Data Item Button

This opens the Data Item properties window, as shown below. Enter a name for the data item in the text entry field. You can also add an additional data item by clicking on the 'Add New...' button.
Data Item Properties

In the General Settings section, enter a Description in the text entry field.
You can then assign values for the input parameters by entering them in the appropriate cells within the parameter columns.
Click Apply to save your changes and Close to exit the properties window.
See Also: