![]()
![]()
Equipment in the asset tree is not available for runtime processing until you activate it. For an equipment node to be active, it (as well as all parent nodes in the asset tree) must be active. If the equipment or any node above it in the tree is not activated, it will not be available for Runtime processing.
|
|
Note: You can create an equipment class so that any equipment node it creates is automatically activated. Simply make sure the Enable check boxes for the equipment class are selected (that is, make sure they have a check mark in them). For more information, refer to the Creating Equipment Classes for Use as Templates topic. |
To Activate an Equipment Node:
Expand the asset tree until you reach the equipment node to be activated
Select the node. If the Equipment form does not open, click the Edit button on the Home ribbon, or right-click the node and select Edit from the pop-up menu.
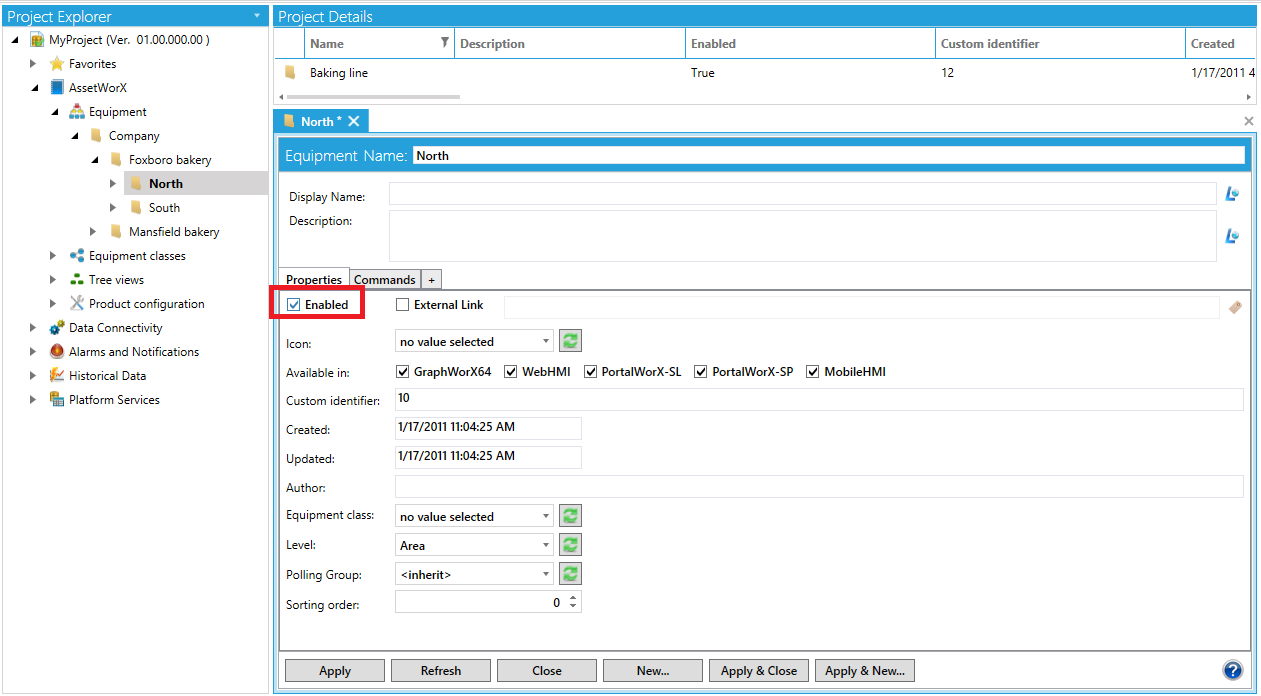
On the Properties Tab, click the Enabled check box to put a check mark in it as highlighted below.
If other providers' tabs are available for the equipment, make sure the equipment is enabled for the providers you want it to be used for. For example, if the Energy AnalytiX provider is installed and the Energy AnalytiX tab appears in the Equipment form, go to the Energy AnalytiX tab and make sure to click the Enable Energy AnalytiX checkbox to put a check mark in it as highlighted below.
Click Apply.
Repeat steps 3 through 6 for each equipment node above the equipment node in the asset tree. For example, following the example shown in these steps, you would repeat the steps for the Foxboro Bakery and Company nodes.
See also:
Adding Equipment to the Asset Tree