![]()
![]()
Hyper Historian logs data to a proprietary database. While you can use the TrendWorX64 and TrendWorX32 Viewers to see and edit your logged data in a graphical format, you may wish to create reports for the logged data or edit data in bulk. For this reason, Hyper Historian comes with a SQL Query Engine that allows you to use common SQL Data Manipulation Language (DML) queries to retrieve and edit data.
NOTE: For more information on the tables and stored procedures that can be queried using the Hyper Historian SQL Query Engine, see SQL Query Engine.
To see if the ICONICS Hyper Historian Linked Server is already present, use the following steps in SQL Server Management Studio.
Open SQL Server Management Studio.
Connect to your local SQL server.
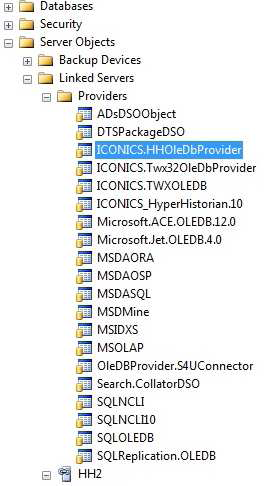
In the Object Explorer on the left, expand Server Objects.
Double-click on Linked Servers to expand it. You should now see a linked server called HH2, which stands for Hyper Historian.
Expand the Providers folder. You will discover a provider called ICONICS.HHOleDbProvider, which is necessary for your queries to work.
Figure 1 - Hyper Historian Provider
In this example, you will use a simple SQL command that reads the list of all tags available in one Hyper Historian Logging Group. Additionally, you will also create another simple query to retrieve logged data related to the selected tag.
Figure 2 - Collector Group
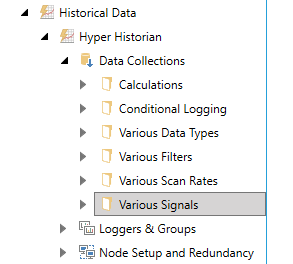
NOTE: This example uses the collector group named “Signals” from the sample Hyper Historian configuration. The display name is “Various Signals”, but the name of the group is “Signals”.
Click on the New Query button, located in the standard toolbar of Microsoft SQL Server Management Studio.
In the SQL Editor that opens, write the following query:
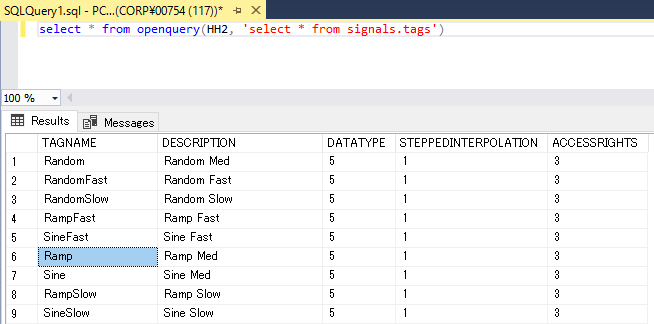
select * from openquery(HH2, 'select * from signals.tags')
Click the Execute button in the SQL Editor Toolbar. You will see a result for the query similar to Figure 3.
Figure 3 - Retrieving Tag Names
NOTE: If you get no results for the query, you probably have no logged data. Open Hyper Historian (with the sample configuration) and go into runtime mode. Then repeat step 3.
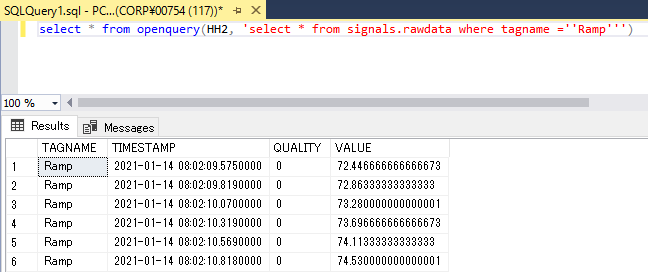
Now select one of the tag names and query the RAWDATA table. This will list all the logged values for the specified tag:
select * from openquery(HH2, 'select * from signals.rawdata where tagname =''Ramp''')
Figure 4 - Logged Data for the Ramp Tag
The Hyper Historian SQL Query Engine can also be used in other containers like Microsoft Excel. The following steps describe how to get Hyper Historian data in Excel.
Open Excel.
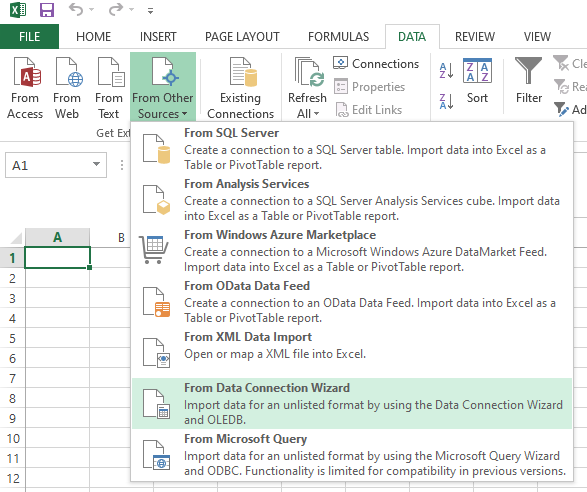
In the Data tab, click the "From Other Sources" button.
Select the "From Data Connection Wizard" option.
Figure 5 - New Data Connection
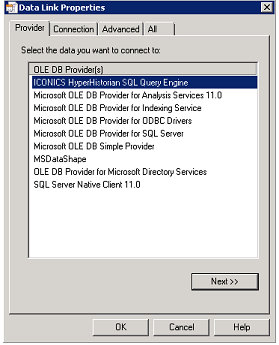
Choose "Other/Advanced" data source, and click Next.
Select ICONICS HyperHistorian SQL Query Engine, and click Next.
Figure 6 - Selecting Hyper Historian SQL Query Engine
On the Connection properties table, enter the “HyperHistorian URL” for a remote Hyper Historian Server or leave it blank (empty) for local server. Select the Catalog “!Root” and Schema “!All” and press OK.
Figure 7 - Selecting Logging Group Name

NOTE: If you get an error message after clicking OK, check to see if your version of Microsoft Excel is 32-bit or 64-bit. There are known issues with Hyper Historian interacting with 64-bit Microsoft Office. Try installing a 32-bit version of Microsoft Excel and repeat step 6.
You will see Database and Table pop-up. Select “!Root” from the dropdown. A list of tables appears as shown in Figure 8.
Figure 8 - Selecting Table
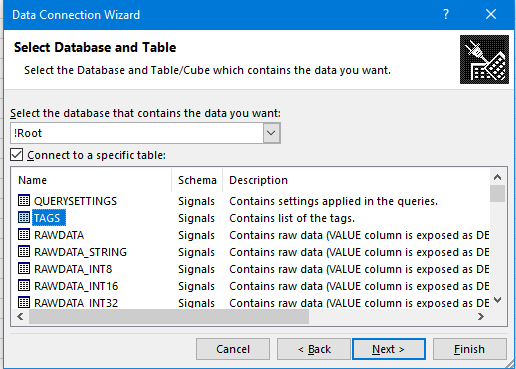
Select the TAGS table, then click Next.
The Data Connection Wizard window appears. Configure the name and description for your data connection file. Click Finish.
Figure 9 - Data Connection Wizard

The Import Data properties dialog appears. Click OK, leaving all the default selections.
Figure 10 - Import Data Dialog

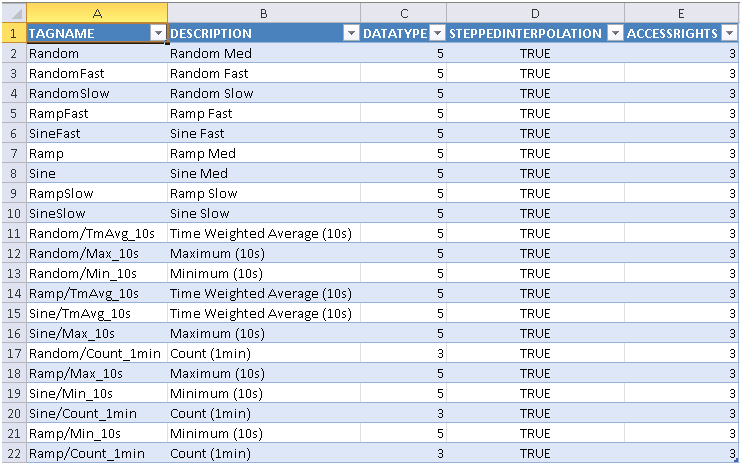
The result of the query will look like the following:
Figure 11 - HH "Tags" Names
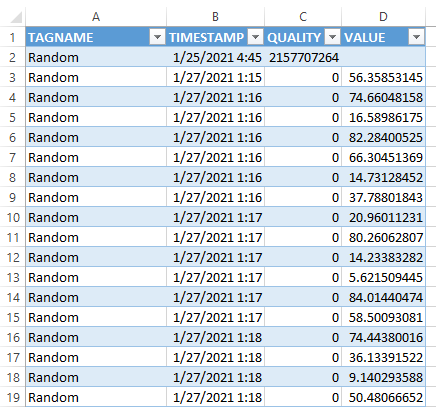
To get a list of values for your tags, repeat these steps but choose the RAWDATA table in step 8.
Figure 12 - RAWDATA (Signals)
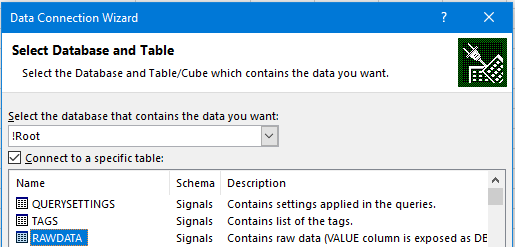
Figure 13 - RAWDATA (Signals) Data in Microsoft Excel
To get data for only a single tag, modify your existing connection and change the “Command” details for Connection Properties.
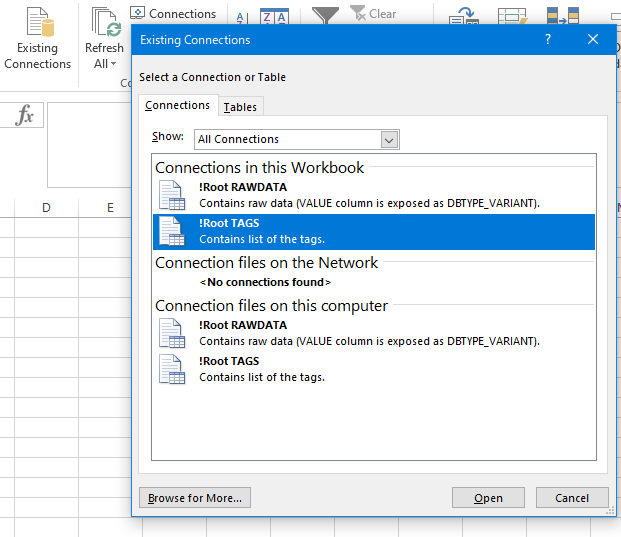
Open Excel, go to the Data ribbon, select Existing Connections, choose your Hyper Historian connection and press Open.
Figure 14 - Modifying Existing Connection Microsoft Excel
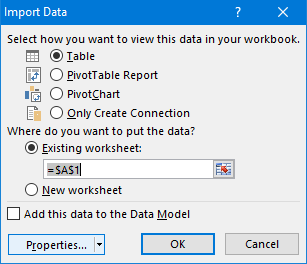
The Import Data Window will appear. Click on Properties.
Figure 15 - Properties of an Existing Connection
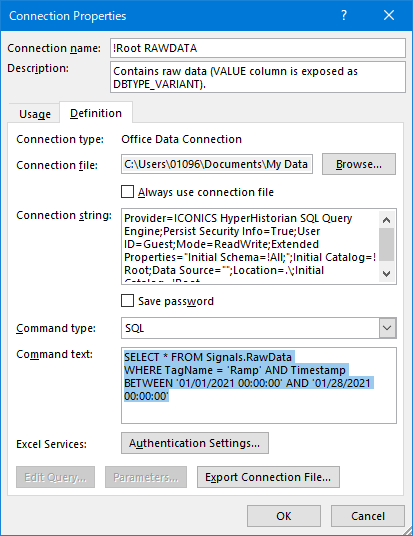
Select the Definition Tab. Change the Command Type from “Table” to “SQL” and change the Command Text to your SQL statement, such as:
SELECT * FROM Signals.RawData
WHERE TagName = 'Ramp' AND Timestamp BETWEEN '01/01/2021 00:00:00' AND '01/28/2021 00:00:00'
Figure 16 - Connection Properties /Command Type/Text
Press OK until you return to Excel. Your data table should now show you the History for a single tag.
Figure 17 - History for a Single Tag (Ramp)

In newer versions of Excel, the Data Connection Wizard has been removed for other methods to retrieve data. The steps below show the new method to retrieve Hyper Historian SQL Query engine data.
Open Excel.
On the Data tab, select Get Data → From Other Sources → From OLEDB.
In the new dialog, select the Build button to open the OLEDB connection string window.
On the provider tab select ICONICS HyperHistorian SQL Query Engine.
Click Next.
On the Connection properties table, enter the “HyperHistorian URL” for a remote Hyper Historian Server or leave it blank (empty) for local server, select the Catalog “!Root” and Schema “!All” and press OK.
In the “From OLE DB” dialog expand Advanced Options and insert the query below:
SELECT * FROM Signals.RawData
WHERE TagName = 'Ramp' AND Timestamp BETWEEN '01/01/2021 00:00:00' AND '01/28/2021 00:00:00'
NOTE: The time range in this query is in UTC and may need to be updated to a more recent time.
Click OK.
In the next dialog, a preview of the data will show. Now click on Load and the data will show in the Excel sheet.
See Also: