![]()
![]()
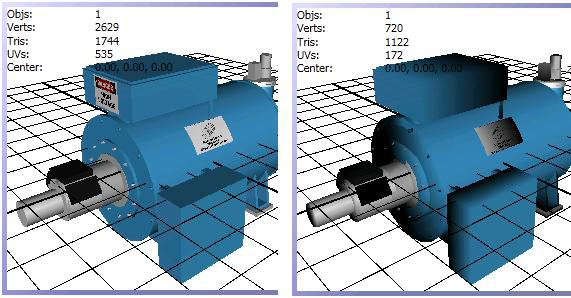
You can use external programs to build 3D models as well as purchase already-built 3D models from other sources. However, when models are built using third-party software, they are generally built to represent objects with great detail. A model that is created in a high-fidelity CAD program typically contains details, such as nuts and bolts, that are not necessary for use in real-time applications such as GraphWorX64. Such details typically are not monitored, their inclusion in a GraphWorX display does not provide feedback to the operator and, in most cases, there is no advantage to including them in a display. In a human machine interface (HMI) project, many of the details become unnecessary; as such, reducing the model’s complexity will decrease demands on hardware to load it and render it. To reduce a model's complexity, what you need to do is reduce the details in the object. Sometimes, this can be as easy as reducing the number of polygons in the model.
It is important to eliminate these unneeded details wherever possible because they add to the number of polygons in a model, which can become a burden for the graphics card and can slow the runtime performance of GraphWorX64. For this reason, it is critical that you eliminate any details that are not required for the real-time context in the display. Eliminate as many as you can by deleting them from the display. Then you can quickly and easily reduce the number of vertices, triangles, and texture coordinates by using the Polygon Reduction tool; this can dramatically reduce the size of an object making it load and render more quickly.
Sample Machine Object, Before Reduction (Left) and After (Right)
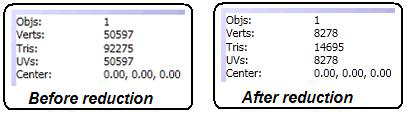
This is most easily illustrated by looking at the legend in a 3D viewport (for more information, refer to the The X, Y, and Z Axis Legend in the 3D Viewport topic). The following figure shows the 3D legend for one model in a 3D viewport. Note the number of vertices, triangles and texture coordinates before and after the reduction.
3D Viewport Legend Before and After Polygon Reduction
You have the option of maintaining a reduced model's original qualities so that the qualities can be returned to their original state.
The following example shows how you might reduce the number of polygons in a smart symbol in the Symbol Library. You can perform these steps for any object that is included in the 3D view of a GraphWorX64 display.
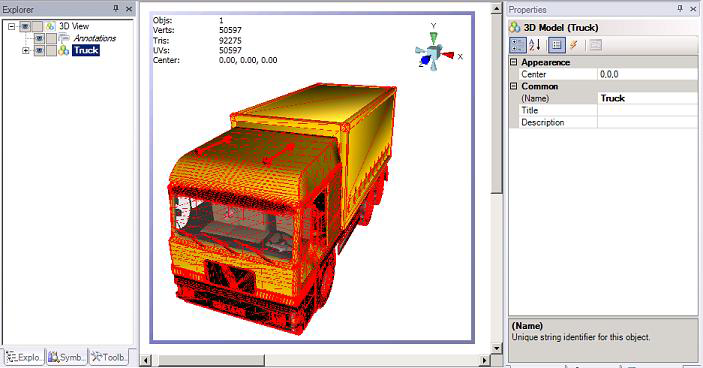
In GraphWorX64, open the display that has the 3D objects whose polygon count you want to reduce. Go into the 3D viewport and in the object Explorer, select the object you want to reduce. It will look something like the following. Note the legend in the 3D viewport and the object's Properties displayed at the right.
Selected Model
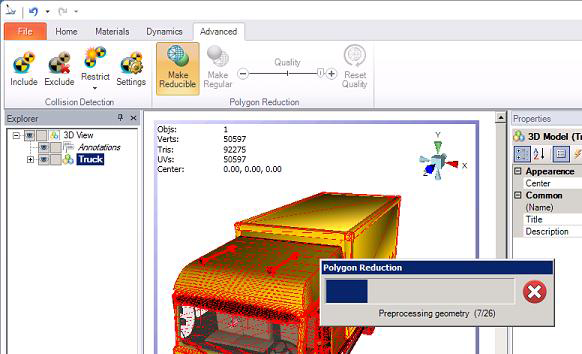
With the object selected, click on the 3D ribbon's Advanced tab. This brings you to the Polygon Reduction tools.
Polygon Reduction Icons on the Advanced Tab in the Ribbon
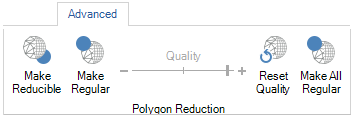
Click the Make Reducible button on the Advanced tab. This starts the polygon reduction process. A status bar appears showing you the process. When it is complete, the status bar disappears and the remaining Polygon Reduction tools become available.
Status Bar
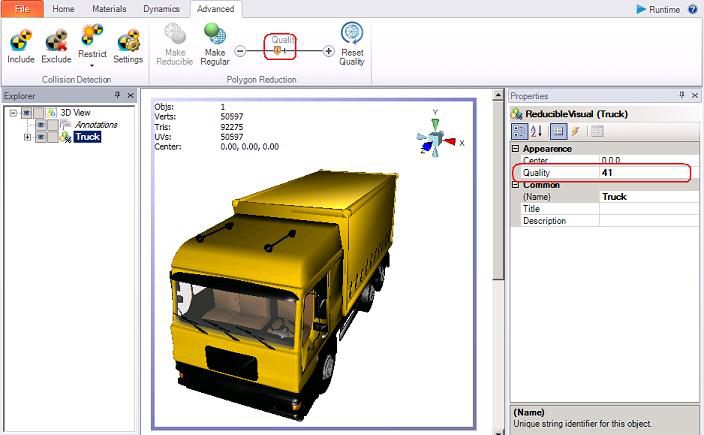
Click on the Quality slider and move it to the left to reduce the quality. As soon as you move the bar, the Quality property appears on the Properties tab, showing you the percentage of reduction. As you do this, the red selection lines disappear so you can see the how the object's appearance has changed. In the example below, at 41% of its original size, the truck shows no significant difference, but at lower percentages noticeable sections of the model start to be affected.
Truck Reduced to 41% of Its Original Size
Click off the model, and then select it again; you will notice that the numbers in the legend change to display the current size.
You can stop here if you like. Taking no additional steps gives you the ability to undo your polygon reduction at any time by clicking the Reset Quality button on the ribbon's Advanced tab. Stopping here improves rendering performance at runtime but because the model's detail are all still stored with the display you will not improve the display's loading performance.
To improve the display's loading performance as well as the model's rendering performance you must make the change permanent by clicking the Make Regular button. When you click Make Regular, the model's current size becomes its 100% quality.
At this point you can continuously repeat steps 3 through 7 to reduce the polygons in the model even more. Each time you make the model reducible, you will once again be able to reduce it by a sizeable percentage before it starts to lose too much detail. In this way you can reduce the model to a size that makes it easy to load and render.
Let's look at what happens in the object Explorer when you click the Make Reducible button. In this example, the truck's 3D groups become reducible groups, and their icons also change. After reducing the polygons, if you then click the Make Regular button to make the changes permanent, the reducible groups revert back to their 3D groups, minus any features that were lost in the reduction. Note how in the example below the "DirectionalLight" object was lost in the reduction.
The 3D Groups Become Reducible Groups, with Changed Icons, also
