|
|
The features on this page require a GENESIS64 Advanced license and are not available with GENESIS64 Basic SCADA . |

![]()
|
|
The features on this page require a GENESIS64 Advanced license and are not available with GENESIS64 Basic SCADA . |
![]()
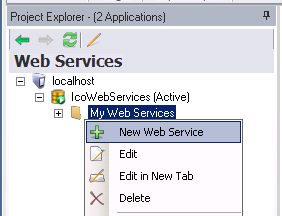
Once you have created a new database or connected to (or activated) an existing one within the Web Services Provider in the Workbench and then created a folder in which to place it, you can start creating new Web Services.
To Add a New Web Service
Right-click on the New Folder that you have already created within the Project Explorer in the Web Services Provider in the Workbench.
Creating a New Web Service in the Web Services Provider
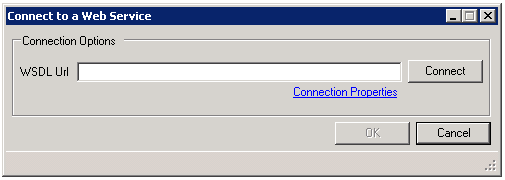
Connecting to a Web Service
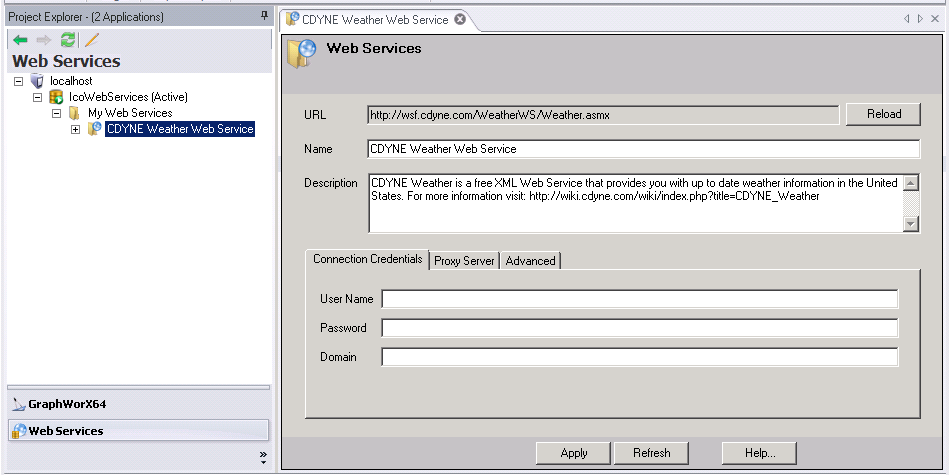
Connection Properties - Connection Credentials Tab
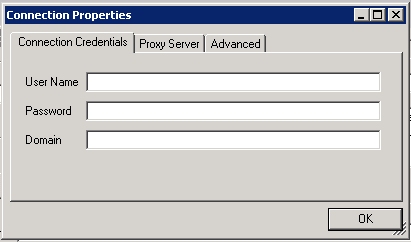
In the Connection Credentials tab (shown above), you can enter a User Name, Password and specific Domain that might be required for the WSDL URL to which you intend to connect.
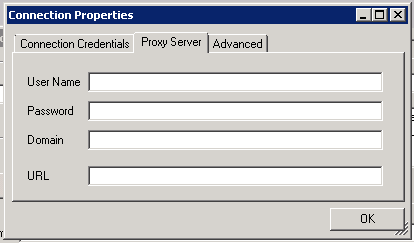
In the Proxy Server tab (shown below), you can enter a User Name, Password, Domain and URL for a Proxy Server (if the WSDL URL requires use of one or if you decide for any reason to use a proxy server) through which you intend to connect to the originally entered WSDL URL.
Connection Properties - Proxy Server Tab
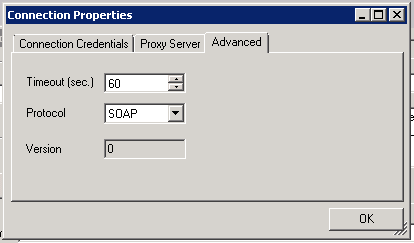
In the Advanced tab (shown below), you can set a timeout (in seconds) after which, the attempt to connect to the WSDL URL will cease. You can select the Protocol as to how to connect (SOAP, HTTP Get or HTTP Post). Depending on prior settings, or any future feature, you can also set a Version number. In this instance, the Version text entry is greyed out and not functional.
Once you have filled out the information within the three tabs of the Connection Properties as you would like, click OK to proceed. You will return to the main "Connect to a Web Service Window".
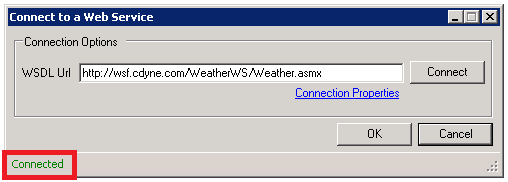
Click Connect to start the connection to your entered WSDL URL. You'll see a connection animation in the bottom left of the window until you see the word "Connected" appear. This signifies that the Web Services Provider has established a connection to the entered WSDL URL, making the connected data available for use in another ICONICS application (such as GraphWorX64 - once the connection to this Web Service entry has been made).
'Connected' Status
Web Service Settings
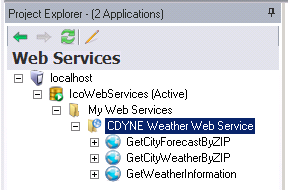
Once you click Apply within a newly added Web Service settings window, you may notice some additional sub-branches added beneath the newly added Web Service within the Project Explorer, as shown below. In the example below, you'll notice that "GetCityForecasByZIP", "GetCityWeatherByZIP" and "GetWeatherInformation" were added along with the "CDYNE Weather Web Service".
Sub-branches Added Along with Newly Created Web Service
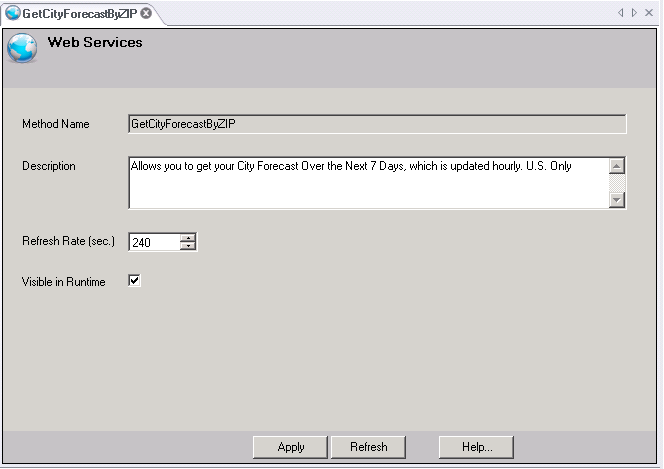
If you double-click on any of these sub-branches, you'll be able to make edits to additional settings. The Method Name might be pre-filled, but you will be allowed to edit the Description, as well as Refresh Rate (in seconds). You also have the option of selecting whether or not you would like this specific Web Service to be available to other ICONICS applications while in Runtime. Click the checkbox if you want to be able to select this particular Web Service, then click Apply to proceed. You'll also need to click on the [X] in the tab at the top of the Web Service settings window in order to close the window itself.
See Also: