![]()
![]()
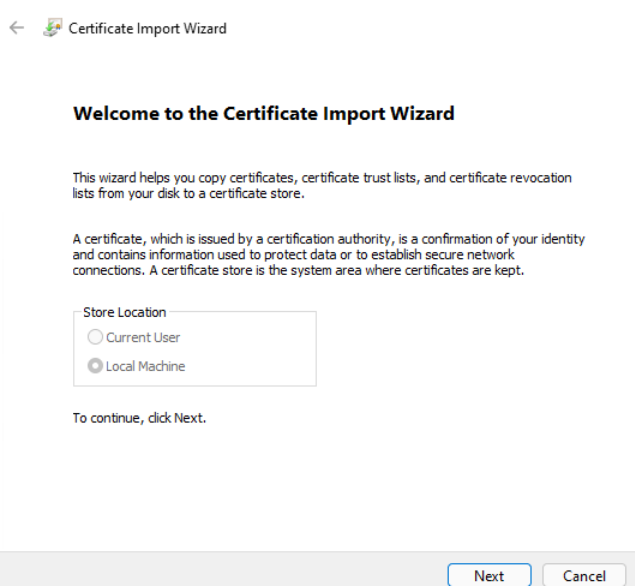
1. Launch certmgr to open the Local Computer Certificate Store.
2. Expand "Trusted Root Certification Authorities", then right-click "Certificates" and select "All Task > Import". In the Certificate Import Wizard, click "Next".
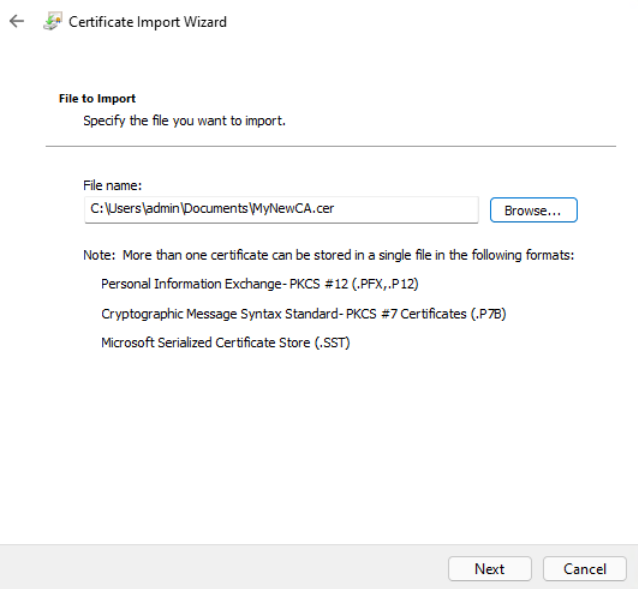
3. Browse to your CA certificate and click "Next".
4. Click "Next", confirm that "Trusted Root Certification Authorities" is selected, and click "Finish". You should get a message that the import was successful. Then click "OK".
5. Right-click "Certificates" under "Personal", and select "All Tasks > Import". Click "Next".
6. Click "Browse" and select your CA-signed certificate. Note that you may have to change the file type filter in the browse window to show .pfx files. Click "Next".
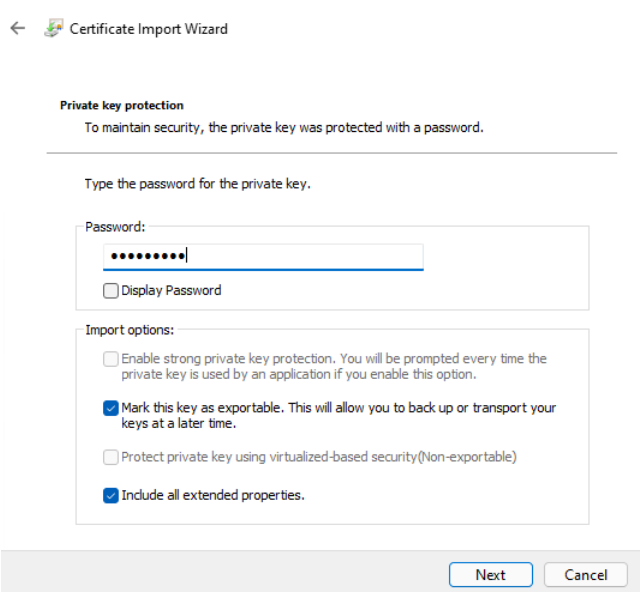
7. Enter the password for your certificate. Check the checkboxes for "Mark this key as exportable", and "Include" all extended properties. Click "Next".
12. Click "Next", confirm that "Personal store" is selected, click "Finish". Once the import succeeds, you should see your certificate listed in the "Personal Store".

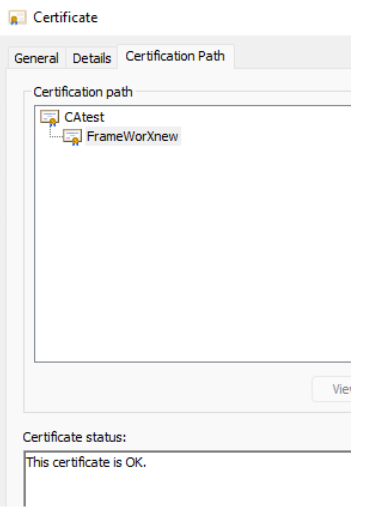
13. If you double-click on the certificate, you should see that it was issued by the CA created, and that the certification path is shown successfully:

1. Using a text editor, auch as Notepad++, open "C:\ProgramData\ICONICS\FwxServer.OpcUa.config".
2. By default, FrameWorX certificates are kept in a file directory store. Since we are using the Windows certificate store, we need to update "StoreType" for the following sections as shown.
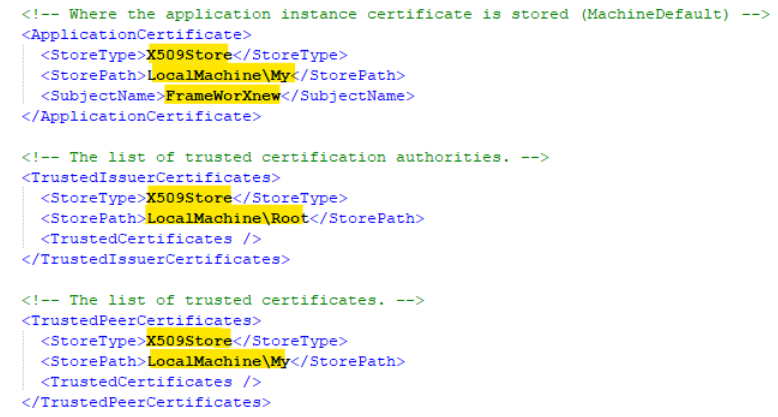
Where SubjectName field matches the Common Name of the certificate.
3. Replace references to "localhost" in this file with your FQDN.
4. Save your changes and restart FrameWorX server.