![]()
![]()
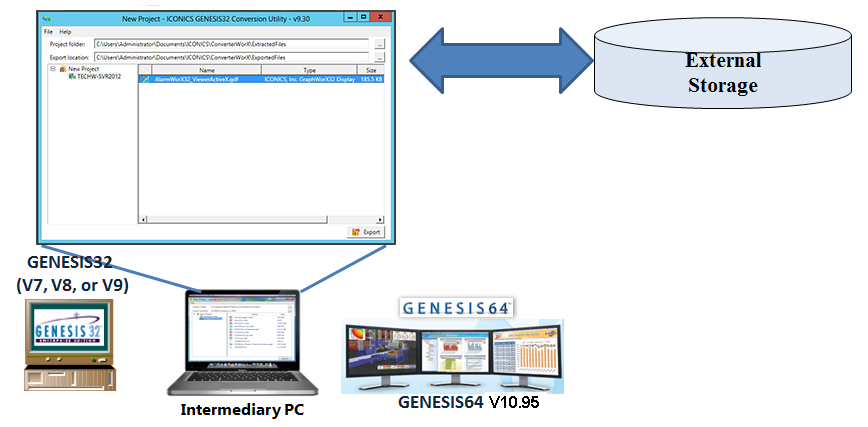
The GENESIS32 ConverterWorX Conversion Utility, the 32-bit 'Export' side of the conversion process, is installed as part of the GENESIS32 V9.3 installation (C:\Program Files (x86)\ICONICS\GENESIS32\Bin\Exporter.exe).
NOTE: ConverterWorX does not support the conversion of scripts and conversion of third-party controls cannot be guaranteed.
ActiveX conversion is supported for Alarm Viewer and Trend Viewer controls only.
The GENESIS32 Conversion Utility's essential functions are to:
GraphWorX32 Displays
Configuration Databases
Other Configuration Info - Also to convert databases to MDB files to be able to copy them easily (within a 4GB limit). This is for logged data.
GENESIS32 Conversion Utility (Export) Process
Adding a File in the GENESIS32 Conversion Utility
To Export an Extracted 32-bit Project File
When you first launch the GENESIS32 Conversion Utility, the Project folder and Export location sections may be pre-filled. You also have the option of creating a new instance of the conversion utility via 'File > New', or can open a saved Exporter project (.epd file) via 'File > Open'. You can also save the export in progress via 'File > Save' or 'File > Save As' (which will save the .epd file).
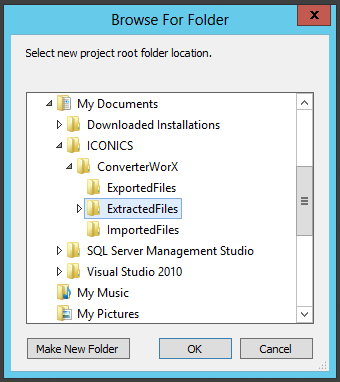
In this example, we will continue with exporting from prior extracted files. You can select the Project folder where your existing extracted files are located by clicking on the ellipsis [...] button to the right of the Project folder text entry field. This opens the Browse for Folder window, as shown below.
Browsing for the Extracted Files
NOTE: The utility works with files/folders in the Project folder directory. Users typically wouldn't point to live data or data that has not yet been backed up. Even though the files are not modified directly by the utility, they could potentially be deleted by mistake. During the export process, the utility copies the file from the Project folder to a temporary directory if it expects that file is going to be modified (configuration upgraded to the later v9.3 format).
Select the folder containing your selected extracted 32-bit project file(s), then click OK.
Next, you can set the destination folder intended for your exported files. Click the ellipsis [...] to the right of the Export location text entry field. This opens the Browse for Folder window, as shown below.
Browsing for Exported Files Location

Select the folder where you intend the extracted 32-bit project files prepared for export to be located, then click OK.
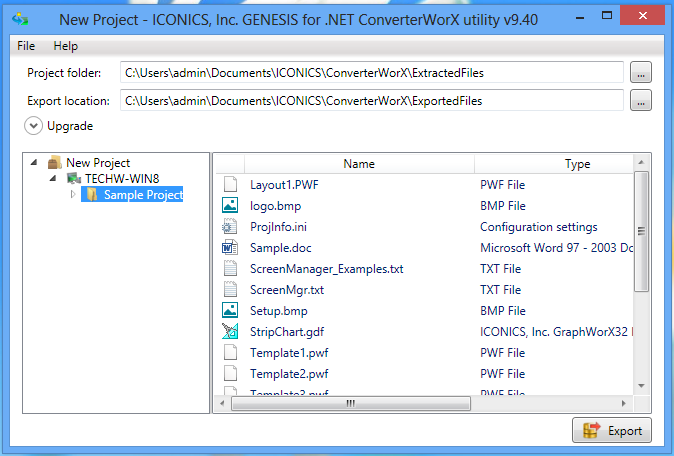
Once you've selected your Project folder, you'll see a project appear in the top of the tree explorer section of the window. [Note: Files placed directly into the main Project folder are ignored. Only files within folder created from the extraction utility will be recognized by the conversion utility.] You can expand the project to see contained folders. You can right-click on the top-level branch to 'Add File...'. You can right-click on sub-branches to 'Add File...' or 'Add Folder...' to the project. You can also Delete any sub-branch. When you click on a folder branch that contains a file to be exported, it will show up in the right-side pane of the window. You can delete any item in the right-side pane by right-clicking it and clicking 'Delete'. Once you've confirmed the project/folder(s)/file(s) you wish to export, click on the Export button on the bottom right of the window.
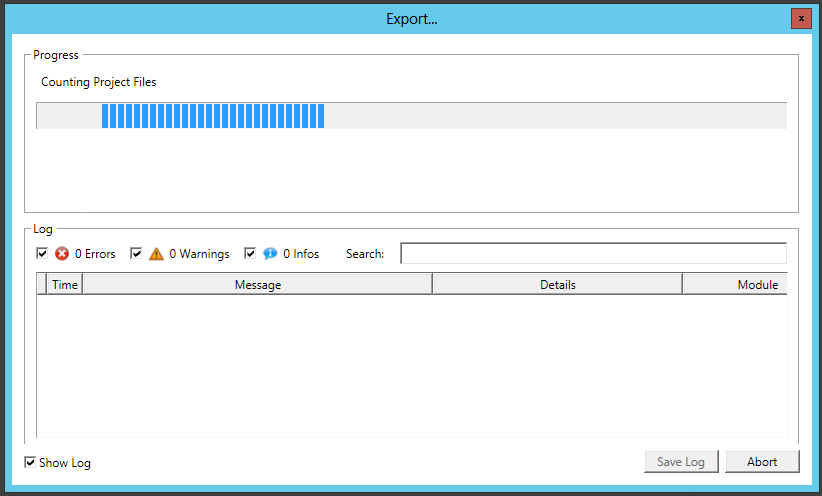
The Export... window will appear, as shown below. The Progress section of the window will show each point in the process as well as a progress bar. You can stop the progress before completion by clicking the Abort button in the bottom right of the window. You can opt to see the Export Log (within the Log section of the window) by clicking on the Show Log checkbox. You can save the log as a .CSV file by clicking on the Save Log button, which opens a 'Save As' window.
Export... Window Showing Progress
Once the export process has completed, you can exit the utility by clicking on the Close button. You can now proceed to the final step in the conversion process, which is to import the resulting extracted, exported files into 64-bit-formatted components.
See Also:
GENESIS32 File Extraction Utility
Auto Configuration Shell/GENESIS64 ConverterWorX Utility