![]()
![]()
If the datapoint names in the CSV files are not fully-qualified Hyper Historian names or you need to do some processing with the data, then you must add MergeWorX tags to map data points in the CSV file to their equivalent Hyper Historian tag names.
NOTE: You can organize a Plugin's tags into folders. To create a folder, right-click the Plug-in and select Add Folder (or select the Plugin and click on the Add Folder button in the Edit section of the Home ribbon in the Workbench). Give the folder a name and click Apply. It appears in the Plugin tree structure in the Project Explorer. Then, right-click the folder and select New Tag to add a new tag to the folder.
To Add a MergeWorX Tag to a Plug-in:
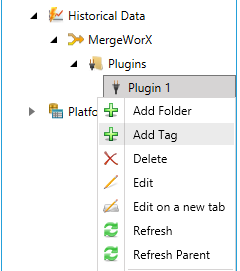
Right-click the Plug-in you are adding the Tag to and select Add Tag, as shown below.
Add Tag from Tree Explorer in MergeWorX Provider in the Workbench
-OR-
Select the Plugin then click on the Add Tab button, shown below, in the Edit section of the Home ribbon in the Workbench.
Add Tag Button

This opens the Tag properties, shown below, in the right side of the Workbench. Provide a Tag Name in the text entry field.
Tag Properties in MergeWorX Provider in Workbench
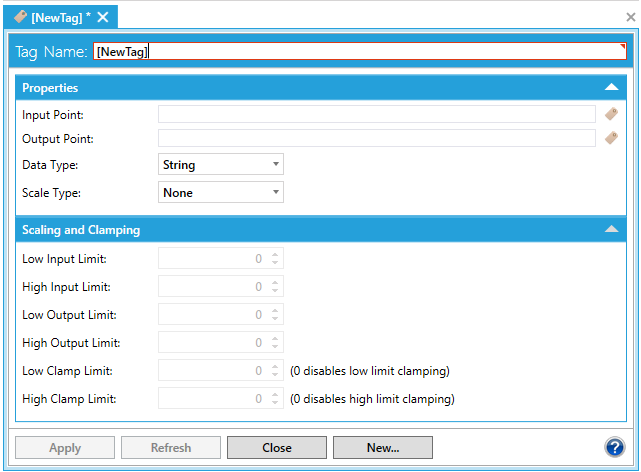
In the Input Point field, specify the DataPoint whose data is to be merged from the CSV file to Hyper Historian. The value you must enter in this field is the DataPoint name in the CSV file. The input point's path must consist of the entire path as it will be parsed from the CSV, including any prefix a @DataPoint definition line if format type 2 or 3 is used. For more information, refer to MergeWorX CSV File Formats.
In the Output Point field, specify the DataPoint where the data is to be written in Hyper Historian. This data point is prefixed by the Output Node specified on the plug-in, so make sure the path specified in this field does not include the path specified as the output node. For more about the Output Node, refer to Adding a Plug-in to the MergeWorX Configuration Database.
Specify the Data Type that the data is to be converted to in Hyper Historian.
Select the Scale Type to be used, and then indicate how you want data to be scaled from the CSV file (Input Range) to the Hyper Historian (Output Range). For example, if Linear scaling is selected, and the input range is 0-1 and the output range is 0-100, a value of .5 in the CSV file is written to Hyper Historian as a value of 50.
Depending on the selection of Scale Type, you can set values for Low Input Limit, High Input Limit, Low Output Limit, High Output Limit, Low Clamp Limit (a value of 0 disables low limit clamping), and High Clamp Limit (a value of 0 disables high limit clamping).
See Also: