![]()
![]()
To Create a Hyper Historian Folder:
Start the Workbench, then expand your project. Next, expand the Historical Data node to show the Hyper Historian node. Expand the Hyper Historian node to show the Data Collections node.
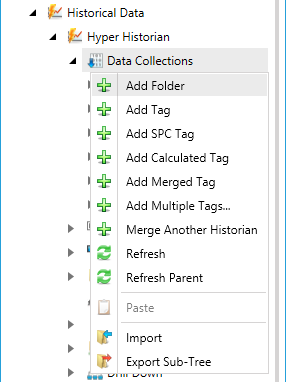
Right-click the Data Collection node in the navigation tree, or any of its sub-nodes, and select Add Folder, as shown in the figure below.
Add Folder from the Project Explorer
-OR-
Select the Data Collections node in the Project Explorer, or any of its sub-nodes, then click on the Add Folder button, shown below, in the Edit section of the Home ribbon in the Workbench.
Add Folder Button

This opens the Hyper Historian Folder properties window, shown below, beneath the Project Details section in the Workbench. Enter a name in the Hyper Historian Folder Name text entry field.
Hyper Historian Folder Properties
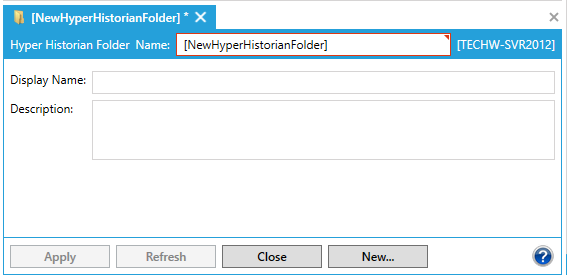
Display Name - (Optional) Enter the name that will appear in the browse tree of the configurator. This can be longer than the folder name.
Description - Enter a description for the folder (optional).
Once you have completed setting your folder properties, click on Apply. Your new folder will appear in your selected location in the Project Explorer.
See Also:
Using the Data Collections and Groups Nodes