![]()
![]()
ScheduleWorX64 is a scheduling management program to control many industries’ needs for scheduling automation, such as controlling building lights, HVAC, machine operation time, and many others.
This Help topic provides a guide on how to configure and use ScheduleWorX64.
ScheduleWorX64 configuration contains the following items:
Schedules
Value Sets
Holidays
Users can open the ScheduleWorX64 configuration from Workbench.
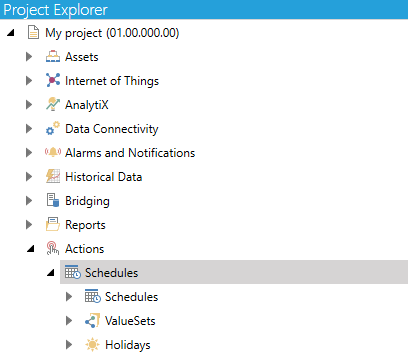
To configure ScheduleWorX64, open Workbench > Actions > Schedules under MyProject.
ScheduleWorX64 Provider in Workbench
Schedules are lists of events and can contain one or more events. Events are scheduled items and can occur periodically.
Value Sets are groups of tags which can be used to write a set of values. These values can be the same or different. Schedules are linked to a set of tags via Value Sets.
Holidays contain lists of days that can be used to override regular schedules.
A schedule is where you put in your events. By assigning a value set to a schedule, you will be able to modify each value set’s behavior for specified events. You can also create weekly recurring schedules, exceptions, and holiday events.
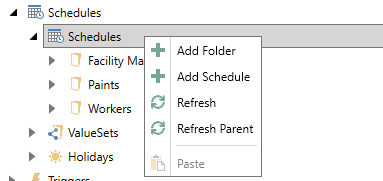
Create a new schedule by right-clicking on Schedules in the left pane tree-control window, and select + Add Schedule.
Add New Schedule in ScheduleWorX64
You should now have a new schedule.
NOTE: In this same right-click menu you can also create a Folder. Folders are used to logically organize the groups.
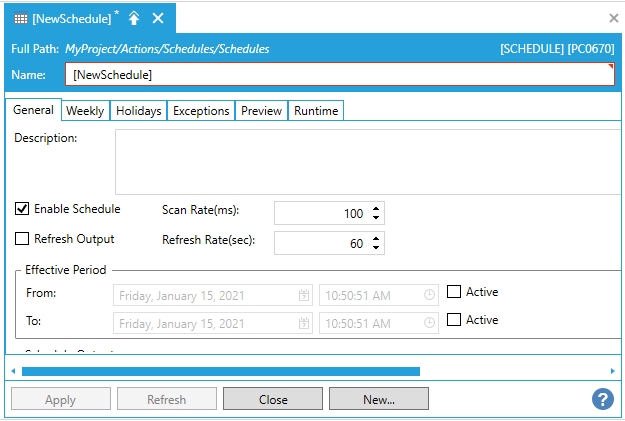
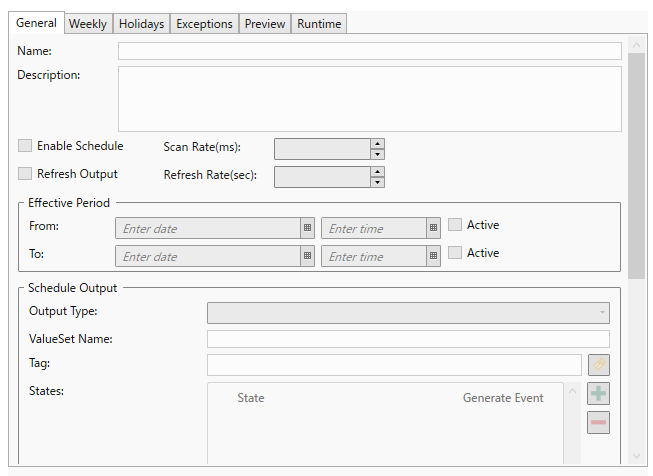
After creating a new schedule, the General tab will open by default. You can give a name to the schedule as well as a brief description.
When you create a schedule, it should already be enabled by default (“Enable Schedule” checkbox checked). This gives you the option to deactivate a schedule as needed.
You can change the scan rate (default is 100 ms). Scan rate is the rate in which the OPC tags are retrieved and refreshed for schedule changes.
Select the Effective Period that you prefer. By default, it will be running forever unless you deactivate the schedule. If you want the schedule to start at specific date or to end at a specific date (or to run in between certain dates), you can set it up in this box.
In the Value Sets box, you can assign a value set to the schedule by typing the value set name, or by clicking on the drop-down button to show existing value sets. Once you have a value set assigned, you can click the arrow for “Jump to ValueSet” to go to that Value Set property window.
You can set the Default ValueSet Value if there is no specific event described in your schedules.
Schedule Properties
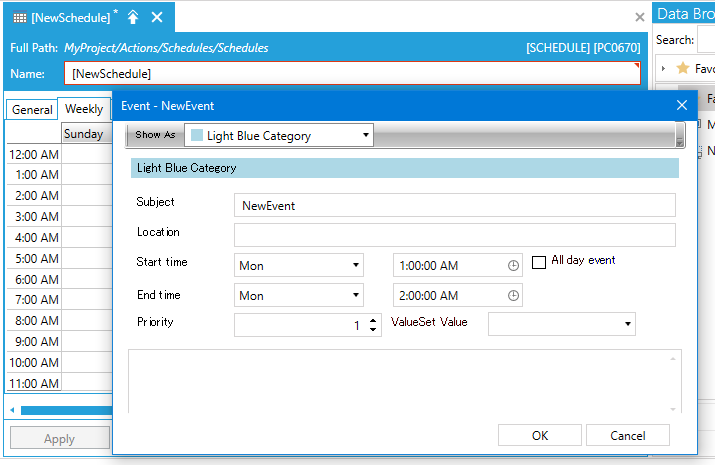
Click on the Weekly tab. You will be able to insert events in here by double-clicking on the timeslot you want and then filling in the details. You can also right-click on the desired timeslot to select the time span that you want and add a new event. Note that every event that is inserted in the Weekly tab will reoccur automatically every week. You can also select the start/end time of the event if it does not exactly occur in 1-hour increments.
Event priority can also be set up to set different importance to events. For example, if on Monday at 1 – 2PM there are two weekly events, then the one with higher event priority setting will take precedence over the lower priority.
Weekly Event in ScheduleWorX64
After you have added all of the required information, you can click OK, and your schedule is set to run.
NOTE: You can view your entire schedule of events, complete with the exceptions and holiday schedule, by selecting the Preview tab.
Click on the Holidays tab in your schedule property window.
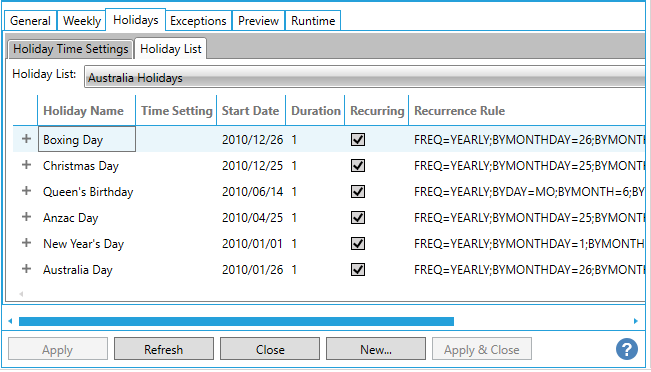
To select the Holiday list that you want, select “Holiday List” tab then select one of the available holiday lists from the drop-down menu.
As soon as you select one list, all the holidays in the holiday list will be listed in the screen. Click Apply to confirm any changes. You can also modify each individual holiday by selecting the “Jump to Holiday List” arrow to go to that holiday list’s property window.
Holiday List in ScheduleWorX64
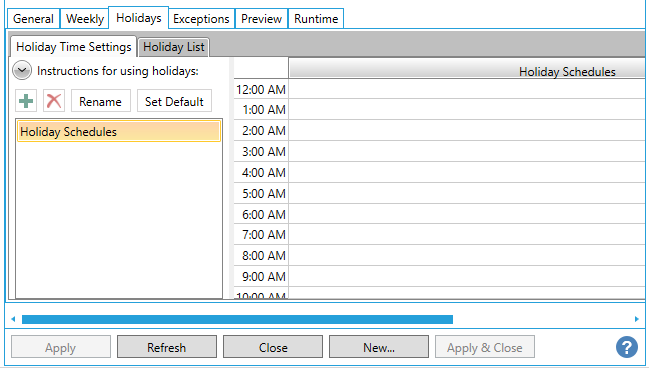
Select the “Holiday Time Settings” tab and create one time setting for your holiday by clicking on the “+”. Give the newly created time setting a name and click OK.
You can then add events in here just like you do in the Weekly tab. Click Apply to save changes.
Holiday Time Settings in ScheduleWorX64
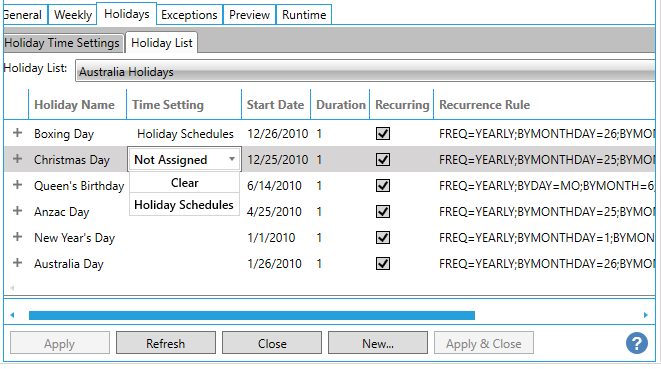
Go back to the Holiday List. There, you can assign any time setting that you have set up to a holiday of your choosing. When this holiday comes, it will operate based on the time setting that you created. To do this, simply click on the Holiday name that you want to assign the time setting to, then click again under the “Time Setting” column. Select the Time Setting you want. Click Apply to confirm any changes.
Assigning Time Settings to Holidays
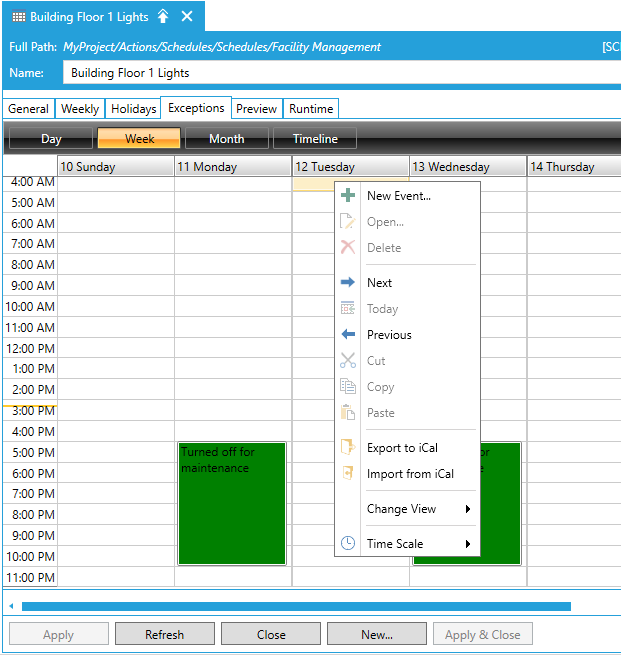
Exception events works exactly like events inserted in the Weekly tab. The difference is that if an Exception event and weekly event exist in the same time slot, the one that will run will be the Exception event since it is a higher priority. The other difference is that Exceptions by default will not recur weekly unless you set it up yourself.
Exceptions give greater flexibility by allowing the events to be set to reoccur daily, weekly, monthly, annually, or any of those combinations (occur on the third Friday every October, occur on the first week of the month every 2 months, etc.). Exceptions also give the option to set the start/end date of the recurrence of a particular exception event (example: Annual meeting on the third week of August occurs until August 2023).
Exception Events
Value sets allow you to write a set of values to a group of tags. Different values can be written at once to tags used in value sets.
In the tree control in the left-hand pane, right-click on ValueSets and select + Add ValueSet.
Properties of the selected value set is opened, and you can enter a name and a brief description in General Settings in the Other Properties tab. You can also create a parameter to be used with the tags. Parameters are a way of using the same value set in multiple schedules. You pass the parameter to each schedule using the parameter name as part of the value set reference. Parameters let you easily set many instances of the same value set. For example, use parameters to assign a value set to the lighting on many floors, with one parameter assigned to each floor.
Under the Value Set Tags section, you define your grouped tags and their aliases. You do not have to use aliases, but they will help you identify the tags under the Value Set Values section.
Value Set Tags

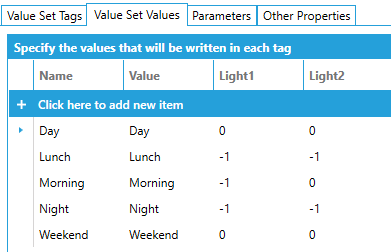
Under the Value Set Values section, you can define the values that will be written to the tags.
Value Set Values
Holidays in ScheduleWorX64 function as a container or group for all of the holidays that a user might have and want to use as part of the schedule.
Holidays is an advanced feature. Please refer to the help files for full instructions on how to use Holidays in your schedule.
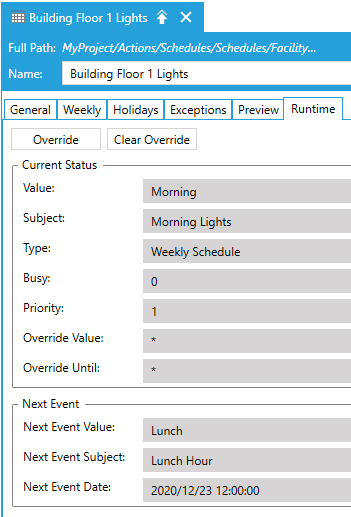
You can monitor the status of currently running Schedules by opening a schedule and clicking on the “Runtime” tab.
Runtime Tab of a Schedule
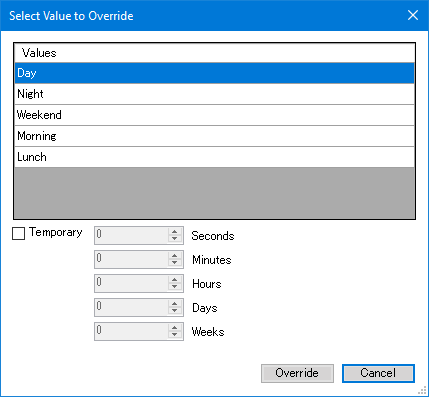
The Runtime tab also allows you to override any schedule with another value. You can optionally set override duration. Overrides will automatically end when the duration expires. You can manually clear overrides by selecting Clear Override option.
Override Options on Runtime Tab
You can use the Schedule Control to display information from ScheduleWorX64 Server. This control can also be used to override currently running schedules, though the control does not allow adding or deleting schedules.
Schedule Control
Please refer to the application note entitled, Schedule Control – Quick Start for more details.
See Also:
Starting Schedules in the Workbench