|
|
The features on this page require an add-on to work with GENESIS64 Basic SCADA. |

![]()
|
|
The features on this page require an add-on to work with GENESIS64 Basic SCADA. |
![]()
Traps are alarms automatically sent through SNMP messages by a device. These messages can say that the "Printer door is open" as well as "The machine has been reset". Thanks to the translation of the SNMP provider, there is no practical difference between traps and OPC alarms management in the GENESIS64 suite.
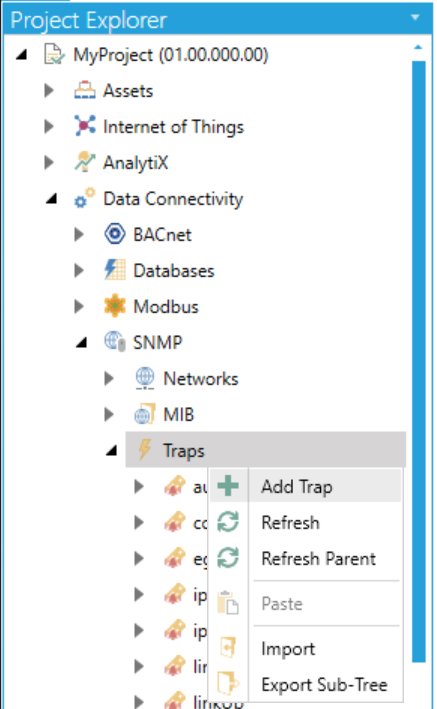
Open the Workbench and expand your project within the Project Explorer. Expand the SNMP provider node. Right-click on Traps, then click on Add Trap, as shown below.
Add Trap from Project Explorer
OR
Select the Traps node in the Project Explorer then click on the Add Trap button, shown below, in the Edit section of the Home ribbon in the Workbench.
Add Trap Button

This opens the Trap properties, shown below, in the middle section of the Workbench. Enter a name for the Trap in the Name text entry field.
Trap Properties
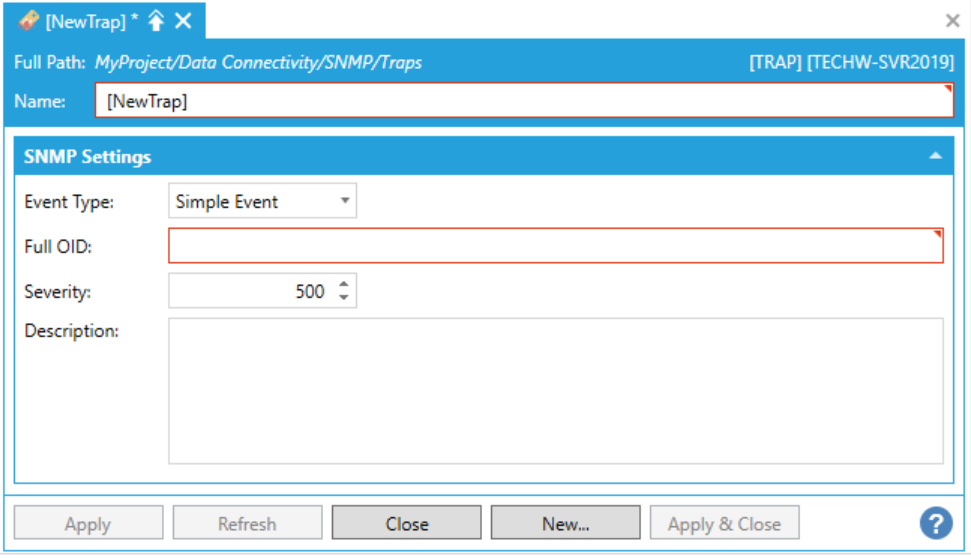
SNMP Settings
Event Type - Use the pulldown menu to select from either Simple Event or Condition.
Full OID - The identifier for every SNMP tag is the Full OID. This information enables the retrieval of the associated data in the MIB dictionary tree (if it exists).
Severity - Enter a severity in the text entry field or use the up/down arrow buttons.
Description -Enter a description of the trap in the text entry field.
When you have completed making changes to the Trap properties, click Apply to save them and Close to return to the Workbench.
See Also: