|
|
The features on this page require a GENESIS64 Advanced license and are not available with GENESIS64 Basic SCADA . |

![]()
|
|
The features on this page require a GENESIS64 Advanced license and are not available with GENESIS64 Basic SCADA . |
![]()
Hyper Alarm Logger is a powerful, high-performance alarms and events logger designed around distributed architecture, built-in redundancy features and greater data storage capacity. Hyper Alarm Logger provides a permanent copy of alarms and event notifications generated by OPC Alarms & Events servers such as ICONICS AlarmWorX64 server and Hyper Alarm Server. Hyper Alarm Logger can also receive notifications from any third party OPC Alarms & Events servers.
Hyper Alarm Logger stores alarm data to an SQLite file format at any selected data storage drive locations. Store and Forward feature can be enabled in case of connectivity interruptions to the target storage drive. Hyper Alarm Logger stores data in a specified location until the connection is restored, at which point the data is synchronized with the selected data storage location.
Hyper Alarm Logger is configured using Workbench, a centralized project management application for GENESIS64. It can be enabled quickly, if not already visible in the Workbench using the following steps:
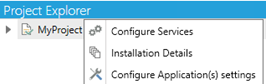
1. In the Project Explorer section in Workbench, right click on your project and open the Configure Application(s) settings.
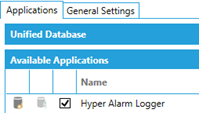
2. Under the Applications tab, check the box next to Hyper Alarm Logger. Click Apply and Refresh.
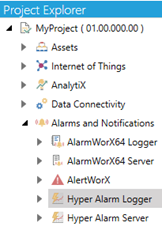
3. Verify that Hyper Alarm Logger is present in the Project Explorer under Your Project > Alarms and Notifications.
1. Open Workbench.
2. In the Project Explorer, under your project > Alarms and Notifications > Hyper Alarm Logger, right click on Loggers and click Add Logger. A new tab will open where this new local logger can be configured. This logger determines where, and how, alarm data is stored and archived.
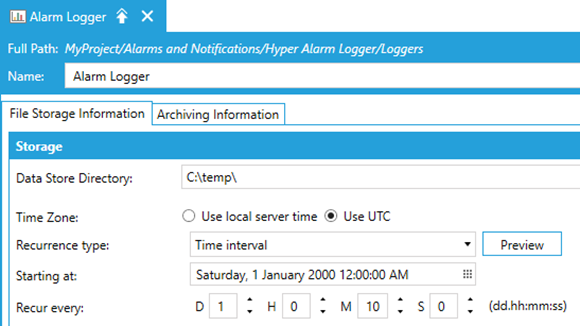
a. File Storage Information tab
i. Choose a name for the logger. This is the “LoggerID” which allows for identification in the next steps.
ii. Select a location to store the alarm database files (ALMD) in the Data Store Directory field. Leaving this field blank will save the file in the default directory. The default directory is a new folder in C:\ProgramData\ICONICS\HyperAlarmLogger\Data with the name of the alarm logger (in this case …\Data\Alarm Logger\).
iii. File interval can be specified using the Recurrence type drop down menu. This is the Time interval or Specific dates and times at which a new alarm database file will be created.
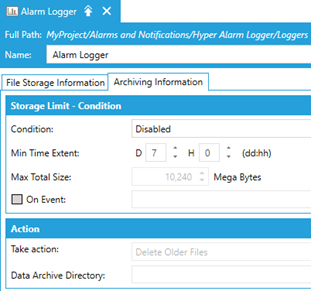
b. Archiving can be enabled and configured from the Archiving Information tab. Archiving conditions can be set to disabled (default) or using time and/or file size limits. Archiving can also be triggered by events configured in Workbench under Actions > Triggers. If enabled, the archiving action can be selected from the Action menu. Files can be deleted (default) or archived to the directory specified in the Data Archive Directory field.
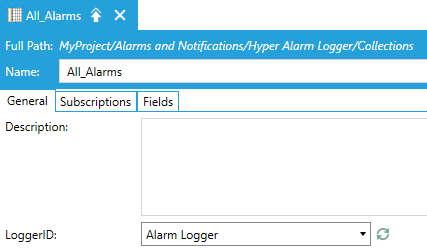
3. Right click on Collections and click Add a Collection. This specifies the source for the Alarms and Events.
a. In the General tab, a name and description can be set for the collection. The LoggerID drop down menu allows for the selection of the logger (such as the one created in the previous step).
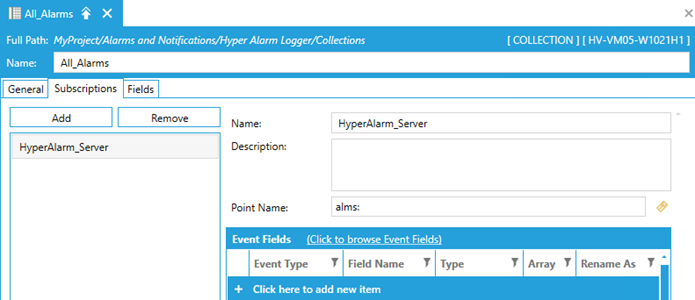
b. In the Subscriptions tab, click Add to create a new subscription, and configure the name and description. Use the data browser icon to select a Point Name – this is the source for the alarms. In the Event Fields section, fields can be added one at a time using the “+” line item, as well as in multiples using the Event Fields browser. These are the fields that will be processed by Hyper Alarm Logger.
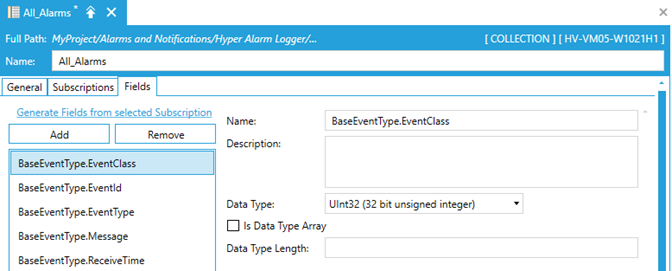
c. Fields in the Fields tab will be empty by default. They may be added individually, or automatically generated by clicking Generate Fields from selected Subscription. This will automatically insert each field that is present in the selected subscription. The Fields tab allows for additional details to be specified for individual fields, such as Data Type Length.
4. Hyper Alarm Logger can be further configured in Product Configuration > System Settings. Redundancy, Point Tracing, and Heartbeat Monitor are disabled by default.
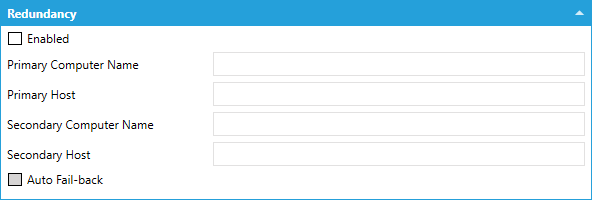
a. Redundancy: When enabled, a primary and secondary computer can be designated. If the primary computer goes offline, logging will be done via the secondary computer. Checking Auto Fail-back ensures that when the primary computer comes back online, Hyper Alarm Logger will revert back to it. After the primary computer comes back online, lost data is synchronized from the secondary computer, such that both datasets remain up to date.
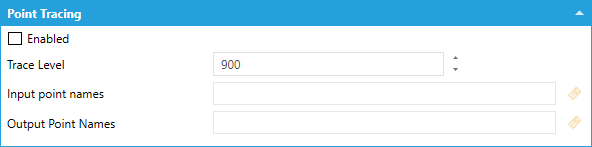
b. Point Tracing: When enabled, it allows for data point updates to be traced when reproducing an error or diagnosing a problem. This should be left disabled unless required, as it is resource intensive.
i. Trace Level: Severity level (defaults to Severe Error (900)) ranging from All (0) to None (1000).
ii. Input point names: Updates from the FrameWorX infrastructure, separated by semicolon (;)
iii. Output point names: Updates for all traffic between the Hyper Alarm Logger and its clients (including requests, responses, data updates, event updates, etc.), separated by semicolon (;).
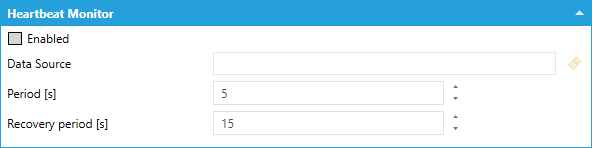
c. Heartbeat Monitor: This setting can only be enabled when Redundancy is enabled. Heartbeat Monitor periodically checks if the primary computer has disconnected from the network. If it has, the secondary computer in the redundant pair then starts logging via Hyper Alarm Logger. Heartbeat monitor can be configured using the following settings.
i. Data Source specifies a data point to monitor for an interruption (such as a PLC counter).
ii. Period [s] is the time interval where at least one data point must be logged to keep the primary computer enabled.
iii. Recovery period [s] is the minimum time frame in which data must be received to enable Hyper Alarm Logger.