|
|
The features on this page require an add-on to work with GENESIS64 Basic SCADA. |

![]()
|
|
The features on this page require an add-on to work with GENESIS64 Basic SCADA. |
![]()
The AssetWorX provider can use Equipment Classes to make adding pre-configured assets even easier. Workbench comes with sample Equipment Classes, but you can also add additional Equipment Classes to be used within the library.
NOTE: Additional Equipment Classes are included ONLY as part of a separate Facility AnalytiX product installation. These contain industry-specific and equipment-specific fault rules and fault costs for ease of implementation. Facility AnalytiX must be installed separately in order to use the expanded list of Equipment Classes.
To Add Equipment from the Library:
Add Equipment from library...

-OR-
Select the asset in the AssetWorX project explorer then click on the Add Equipment from library... button, as shown below.
Add Equipment from library... Button

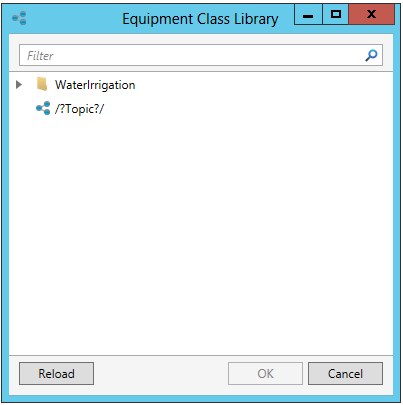
This opens the Equipment Class Library window, shown below. Upon initial use, the window will show the pre-installed Equipment Classes, similar to those shown below. Once you add your own Equipment Classes, they will appear in the list, as well. You can enter a term in the Filter text entry field to locate a specific Equipment Class. You can also click on the Reload button in order to refresh this list. Click on your selected Equipment Class from this list, then click on OK.
Equipment Class Library Window
This opens the Instantiation Options window, as shown below.
Instantiation Options Window
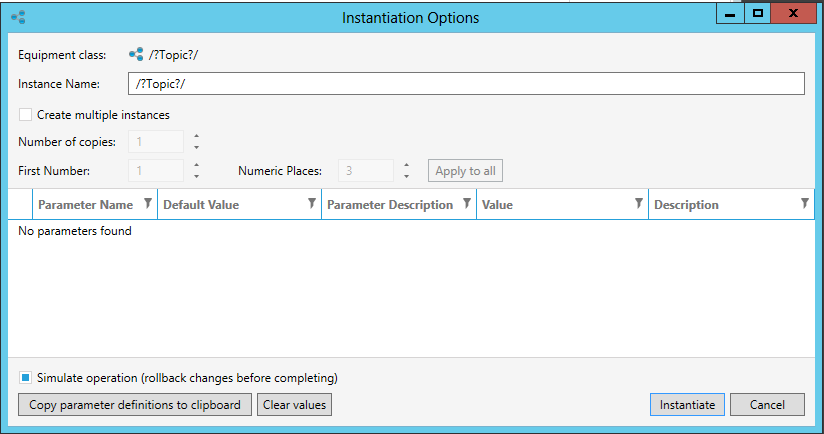
You can opt to Create multiple instances of your selected Equipment Class, by clicking on the checkbox. Once the box is checked, you can set the Number of copies of the Equipment Class that you'd like to add by entering a number in the text entry field. You can also append a First Number to each additional instance of the Equipment Class name, as well as set the number of Numeric Places the appended number will take.
Click the Simulate operation (rollback changes before completing) checkbox to see how these changes would appear before they are confirmed.
You can also opt to either Copy parameter definitions to clipboard or Clear values.
Once you have confirmed your settings here, click the Instantiate button.
Your selected Equipment Class will now be added as an asset within your selected location in the AssetWorX project explorer in Workbench.
See Also:
Introduction to Equipment Classes (Templates)