The Create Certificates button, shown below, in the Certificates section of the Home ribbon in the Workbench, allows users to create certificates involved in the verification and validity authentication of parties involved in electronic transactions.
Create Certificates Button

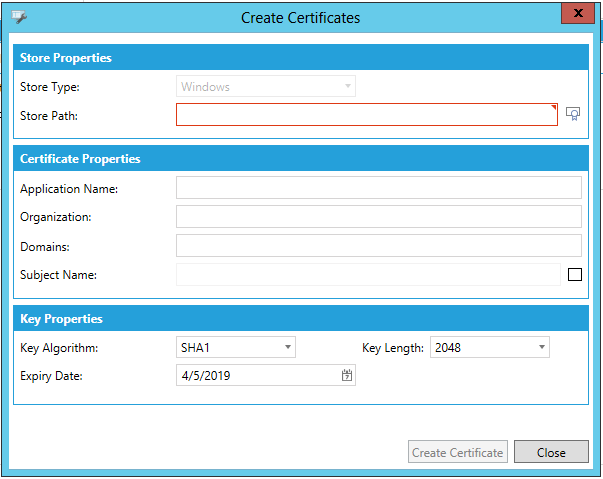
Clicking this button opens the Create Certificates window, shown below.
Create Certificates Window

Store Properties
Store Type - When activated, use the pulldown menu to select your store type. In the image above, this has defaulted to Windows.
Store path - Enter a store path for the created certificate or click on the  button, which will open the Certificate Browser window, allowing you to navigate to/select your preferred path location.
Certificate Properties
Application Name - Enter the application name to be used in conjunction with the created certificate in the text entry field.
Organization - Enter the organization originating the certificate in the text entry field.
Domains - Enter the intended domains to be used with the certificate in the text entry field.
Subject Name - If you wish to include a Subject Name with the certificate, click the checkbox to the right, which will activate the text entry field to do so.
Key Properties
Key Algorithm - Use the pulldown menu to select from MD5, SHA1, SHA256, SHA384, or SHA512.
Key Length - Use the pulldown menu to select from 1024 or 2048.
Expiry Date - Enter an expiration date for the certificate in the text entry field or click on the  button to open the date picker and select your desired date.
When you have completed your settings, click on the Create Certificate button to create the certificate and then on Close to return to the Workbench.
See Also:
Certificates Section of the Home Ribbon