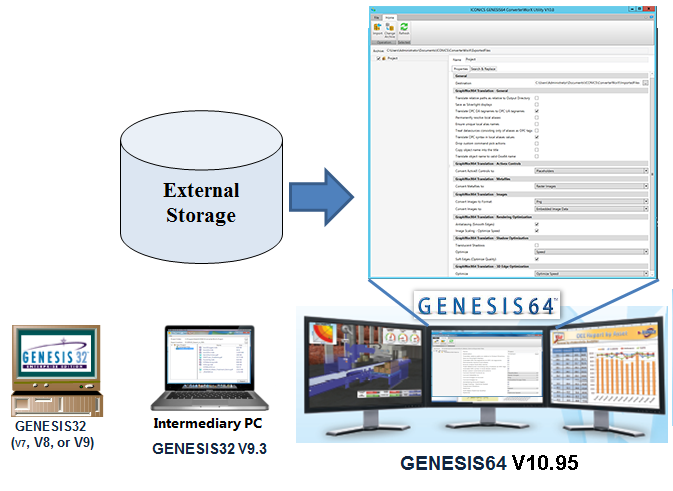
The Auto Configuration Shell/GENESIS64 ConverterWorX Utility, the 64-bit 'Import' side of the conversion process, is installed as part of the GENESIS64 V10.8 installation (C:\Program Files\ICONICS\GENESIS64\Components\FwxImportExportApp.exe). Its essential functions are to:
Import configurations into GENESIS64
GraphWorX Displays
Logged AlarmWorX and TrendWorX Data
Configuration Databases
Other Configuration Info
GENESIS64 Conversion Utility (Import) Process
When First Launched, the Utility Opens as the 'Auto Configuration Shell'
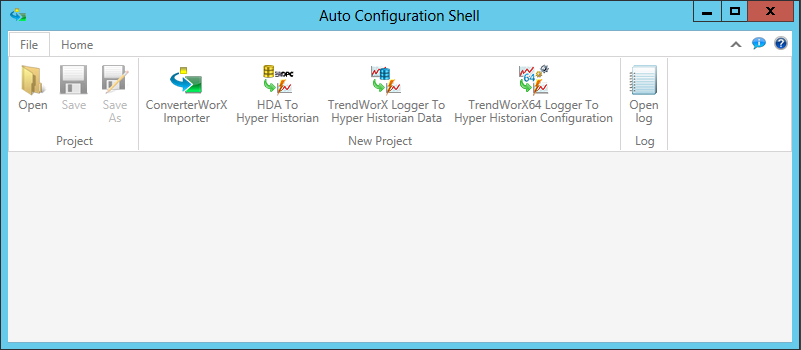
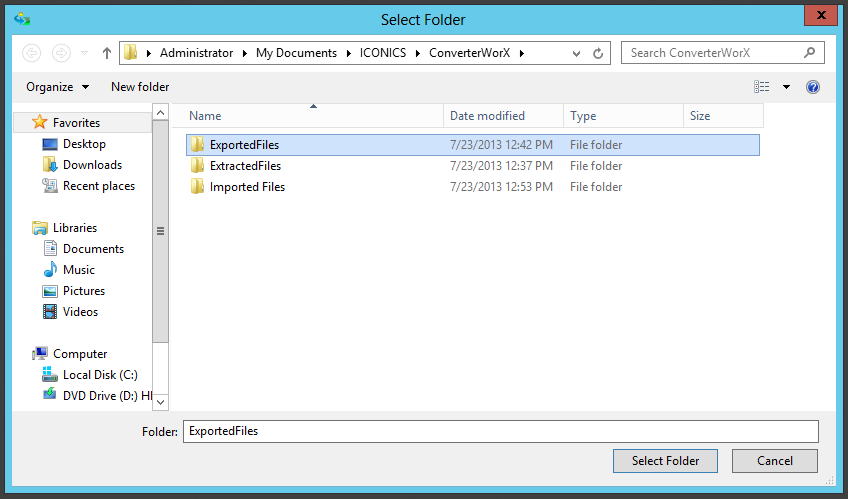
When you first launch the utility, you'll notice that the application's title bar is listed as 'Auto Configuration Shell', as shown above. From the File ribbon, in the New Project section, click on the ConverterWorX Importer button. This opens the 'Select Folder' window, as shown below, which allows you to navigate to where you have stored your Exported Files from the GENESIS32 Conversion Utility.
Selecting the Location of Exported Files
Once you have selected your Exported Files folder, you'll notice that the application's title bar is now listed as 'ConverterWorX Importer'. Also, the 'Save As' button within the File section of the File ribbon will now be active. If you click on it, you'll be able to save this project as a .cwxi file, which, after saving in your selected location, can be retrieved through the utility via the Open button.
The utility has now pulled in the individual elements that were extracted while using the GENESIS32 File Extraction Utility and that were exported using the GENESIS32 Conversion Utility. Note: If all the utilities are on same PC and used with default locations, they will automatically pull the results from the previous utility used.
ICONICS GENESIS64 ConverterWorX Utility

Enter a new Name for the existing Project, if so desired. You can then proceed with making additional settings via the Properties tab. You can also use the additional tab to Search & Replace.
The Properties Tab of the GENESIS64 ConverterWorX Utility is context-sensitive. The listed Properties will change based on the component type selected in the Project tree explorer on the left side of the window.
Properties Tab - AlarmWorX64 Server
Properties Tab - AlarmWorX64 Logger
Properties Tab - BACnet Configurator
Properties Tab - Global Aliasing
Properties Tab - Global Aliasing
Properties Tab - Language Aliasing
Properties Tab - ScheduleWorX64
Properties Tab - SNMP Configurator
Propertes Tab - TrendWorX32 to TrendWorX64 or Hyper Historian
Properties Tab - TrendWorX64 Logger
The Search & Replace Tab in the GENESIS64 ConverterWorX Utility allows you to make text substitutions within your source 32-bit project. This can be useful for product or organizational name changes, etc. Once you click on the Search & Replace Tab, you'll see the row marked 'Click here to add new item'.
Initial Use of the Search & Replace Tab

Once you click on the row, you'll be able to enter your Search term, the text you wish to Replace it with and whether you wish for the search to make replacements only if the comparisons Match Case and/or Match Whole Word.
Term Entered for Search & Replace with Match Case and Match Whole Word Selected

Any terms you have entered here, with replacements and options, will be replaced during the conversion of the 32-bit source project to the converted 64-bit project.
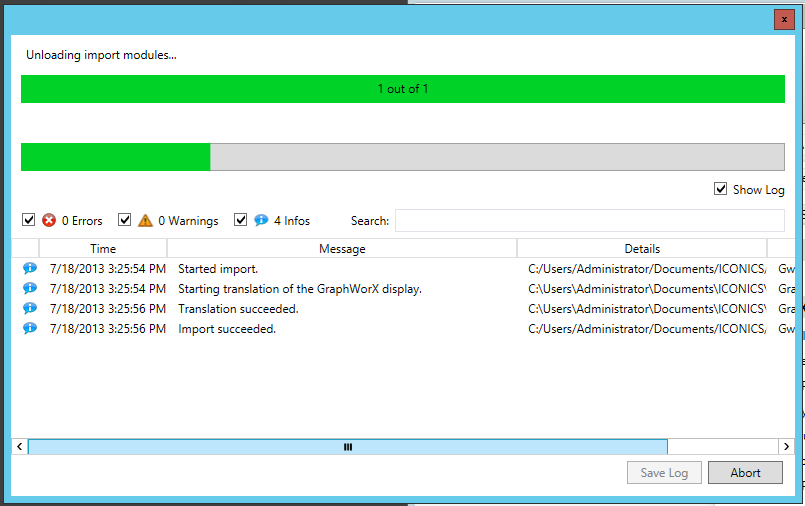
At this point, you still have the option to change the location of the root folder for the project (what you see in the navigation tree on the left side of the window) by clicking on the Change Archive button in the Operation section of the Home ribbon. If you have completed all settings, click on the Import button. The conversion process, shown below, now takes place. The top status bar relates to the number of individual elements to the 32-bit project being converted. The bottom status bar relates to the conversion of each separate element. The bottom section of the conversion window shows Errors, Warning and Info Boxes (if checked), along with the Time for each phase of the conversion, a related Message, Details and Modules. You can also elect to Abort the conversion process at any point. You can also choose to keep a record of the process (as a .csv file) by clicking on the Save Log button. Close the conversion window, then the main utility window to exit the program.
Project Conversion In Process
Once you've created the converted 64-bit project, you can open it as if you would any other project file. The image below shows a former 32-bit sample project that has been fully converted and opened within GraphWorX64.
Converted 32-bit Project Now Running in Configuration Mode Within GraphWorX64

See Also:
GENESIS32 File Extraction Utility
TrendWorX Logger to Hyper Historian Data
TrendWorX64 Logger to Hyper Historian Configuration