The Project Explorer in the Workbench

In the GENESIS64 Workbench Classic, the Project Explorer encapsulates the ICONICS project that you are working on and its content defines the breadth of a project. Click here to see the Project Explorer. The Project Explorer is also the navigational component navigation tree for quick access to different application’s data. application that is in the project and navigate its data. Button bars and icons make it easy to access applications from inside the Workbench Classic. The Project Explorer displays applications, tools, and server configuration and display files in a navigation tree style. It can be:
Docked to any side of the Workbench Classic window. To move the pane click the title bar and move the pane onto any of the arrow icons of the Diamond Dock feature. Click here to see an example.
Free floating. Click and drag the toolbar of the Project Explorer off of a docked position to make it free floating. Double click on the Project Explorer title bar to return the pane to its last docked position.
Minimized to a tab. Click the push pin icon in the Project Explorer title bar to minimize the pane to a tab. Click the tab to view the Project Explorer expanded, or click again on the push pin to return the pane to view.
Unlike many of the panes in GraphWorX64 which can have their view suppressed in the Show/Hide tab group of the View ribbon, the Project Explorer is always in view within the Workbench Classic in one form or another.
The Project Explorer can be modified to show just those applications, tools, and services that you need for your project. You can re-size the pane, as well as to move the slider up or down to view more button bars. Each button bar switches the Workbench Classic view to show the component that is shown in the title. The Workbench Classic project explorer allows you to display multiple projects at once. You can open each up in a separate tab.
To move between the components:
Click the buttons listed in the Project Explorer.
To remove a component from view or add the component back:
Click the Button menu button.
Enable or disable the component of interest.
Click Show Fewer buttons to remove the last component in the list or Show More Buttons to return the last component that was removed.
You can also use the Edit Project button on the Project ribbon to add and remove components, as well as alter the properties of the component's display in the Project Explorer. The Add/Remove Project Application dialog box (click here to see an example) is displayed by the Edit Projects button.
When you have the Project Explorer in the state that you want it in, save the state as a Project. You should also consider saving your project whenever you make configuration settings that you want to preserve as part of the work you are doing. Projects are the way that you work with multiple displays in multiple locations; and Workbench Classic provides the tool that you can use for distributed management of projects through project servers. The topic Working with Projects has more details on this subject.
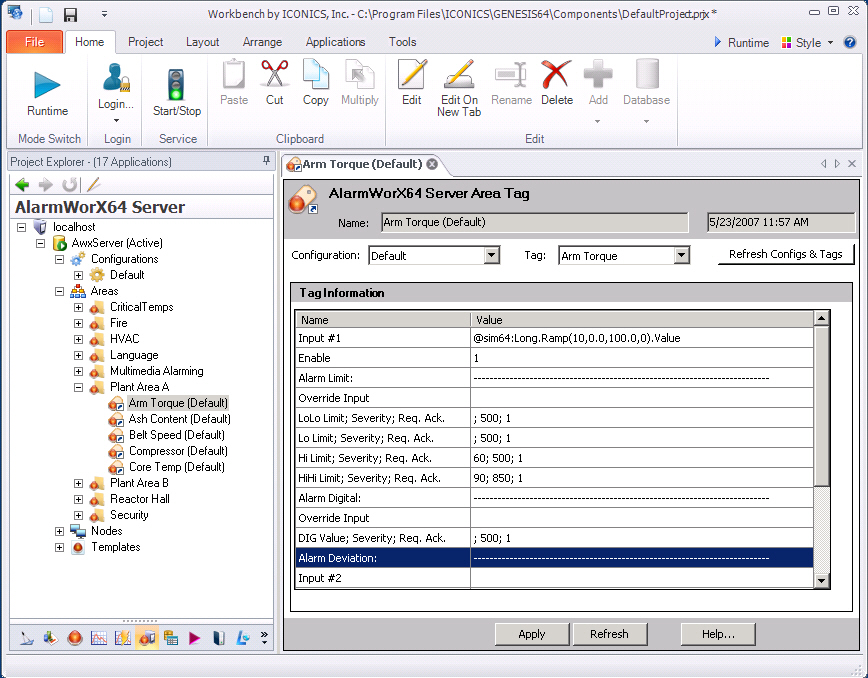
When you view components in the Project Explorer you are viewing either configuration or data display files. For example, while GraphWorX64 shows you a tree of your display files, the AlarmWorX64 Server shows you a set of configuration forms for object data stored in the AlarmWorX64 SQL database. The tree is organized into a hierarchical object tree of Server database with Database object at the top, stored Configurations for different items with alarms of different types, geographical organization using the group object called Areas, and a group object called Nodes which organizes redundancy configuration aspects. Click here for an example of the AlarmWorX64 Server with an Area tag configuration form.
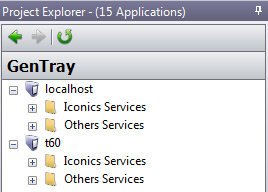
What you see in the Project Explorer is a function of the project or projects that you have opened. As you can read in the topic Working with Projects you can open one or more connections to projects using the Connect to Server button on the Project ribbon. When you have more than one project open each project is shown with its own tree.
At different points working in the Project Explorer you may want to its Refresh button ![]() to view the current condition of the Project Explorer tree. As you add or remove projects, switch between applications, or come back to work in the Workbench Classic after a period of inactivity, click the Refresh button.
to view the current condition of the Project Explorer tree. As you add or remove projects, switch between applications, or come back to work in the Workbench Classic after a period of inactivity, click the Refresh button.
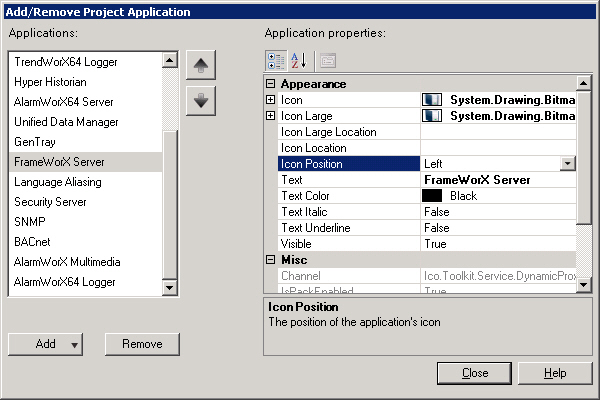
You can alter the properties for the applications or components that you see in the Project Explorer within the Add/Remove Project Application dialog box. The settings that you control are rather limited, being mostly changes you can make to the icon or label, to the text style, or position. The Add/Remove Project Application dialog box with the FrameWorX Server selected is a good example of the settings that are available.
To alter application properties that you see in the Project Explorer:
Click the Edit Project button on the Project ribbon to view the Add/Remove Project Application dialog box.
Select the application you want to modify in the Applications list box.
Change any property that you desire in the Application properties list box.
Click the OK button to enforce your changes.
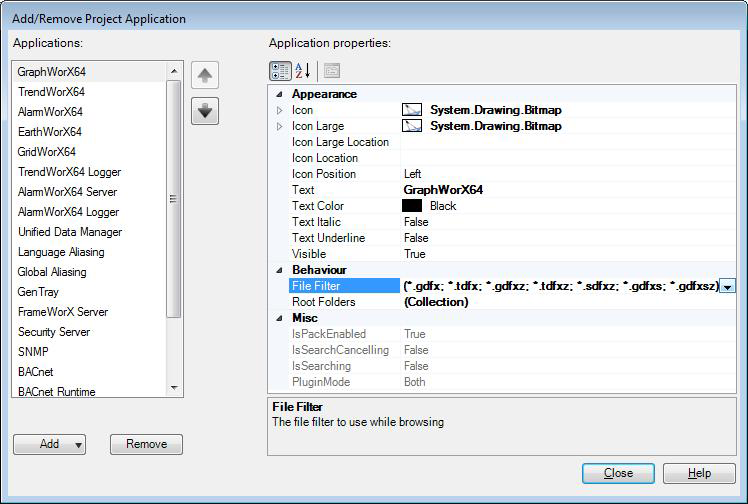
There are some notable properties that you should be aware of in that they affect the files that you can view in Open file dialog boxes. The GraphWorX64, AlarmWorX64, TrendWorX64, EarthWorX64, and GridWorX64 plug-ins' Behavior settings allow you to set a File Filter such that only the files with those extensions can be viewed while browsing. Click here for an example that shows the File Filter Property. Notice that this particular filter for GraphWorX64 not only allows you to view display files (.GDFX, etc.) but template files (.TDFX, etc.) as well.
You can also control the view of the navigation tree for a Workbench Classic component by altering the Root Folders property. When you click the ellipsis button ![]() in the Root Folders property you open the Folder Collection Editor. Each root folder that you add appears as the top level in a tree that appears in the Project Explorer.
in the Root Folders property you open the Folder Collection Editor. Each root folder that you add appears as the top level in a tree that appears in the Project Explorer.
Use the table below to set the properties you desire.
|
Property |
Settings |
Description |
|
Appearance Section |
||
|
Icon |
Icon bitmap |
Specify the file to display as the application's embedded image in the provider button bar and the application tray of the Project Explorer. You can expand this option to provide additional properties. |
|
Icon Large |
Icon bitmap |
Specify the file to display as the application's large icon in the Workbench Classic ribbon's Applications tab. You can expand this option to provide additional properties. |
|
Icon Large Location |
Pointer or shortcut |
Specify the file to display as a referenced image for the application's large icon. |
|
Icon Location |
Pointer or shortcut |
Specify the file to display as a referenced image for the application's small icon. |
|
Icon Position |
Left, Right, Top, or Bottom |
Alignment of the provider's icon in the Project Explorer button bar.
|
|
Text |
Label text |
The text for the label |
|
Text Color |
Label text color |
Color of the text for the label |
|
Text Italic |
Label text in italics |
Italics text |
|
Text Underline |
Label text in underline |
Use if you want the text to be underlined |
|
Visible |
Show the button bar. |
Hides or shows button. |
|
Behavior Section (for GraphWorX64, EarthWorX, AlarmWorX64, TrendWorX64, and GridWorX64 providers) |
||
|
File Filter |
File types) you can see in Open file dialog boxes. |
Used to limit view of file to current application type. |
|
Root Folders |
Top folders shown in Project Manager as tree roots. |
Used to conveniently provide access from the stated root folders. |
|
Misc Section |
||
|
Channel |
|
(not available for all providers) |
|
IsPackEnabled |
|
|
|
IsSearchCancelling |
|
|
|
IsSearching |
|
|
|
Oem |
|
(GenTray only) |
|
OemGenBroker |
|
(FrameWorX Server only) |
|
Max Tags |
|
(BACnet Runtime and ScheduleWorX64 only) |
|
MonitoringDispatcher |
|
(BACnet Runtime and ScheduleWorX64 only) |
|
PluginMode |
|
|
|
RuntimeServiceName |
|
(not available for all providers) |
|
Service |
|
(not available for all providers) |
See also: