Setting up Windows to Support SNMP Connectivity
Simple Network Management Protocol (SNMP) is a communication standard that facilitates the exchange of network information between SNMP enabled devices. An SNMP network consists of a Network Management System (NMS), Managed Devices, and Agents. An NMS would monitor or control managed devices that provide SNMP information through the agents. This is how SNMP works with GENESIS64.
You can consider ICONICS GENESIS64 as an NMS. The Managed Devices are your routers, printers, servers, etc. The Agents are software on the managed devices that provide management information.
This topic walks you through the steps of installing and setting up your SNMP services from windows.
Installing the MS Windows SNMP Agent
- Start Microsoft Windows operating system installation. Cancel out of any popup windows.
- Open Programs and Features from the Control Panel.
- Click on "Turn Windows features on or off" in the left-hand panel.
- In the Windows Features window, check the box next to Simple Network Management Protocol (SNMP). Click on “OK”.
- Click on “OK" to save your selection.
NOTE: When prompted to locate the Windows CD and specific files, look under the \I386 folder on the CD.
Configuring the MS Windows SNMP Agent Service: SNMP Data
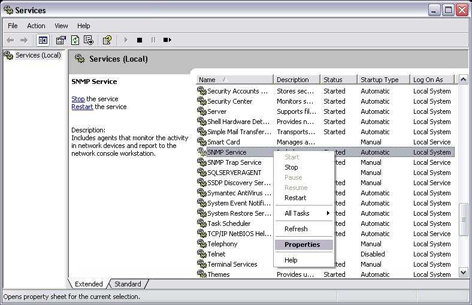
- Go to Start -> Programs -> Control Panel -> Administrative Tools -> Services.
- Select SNMP Service and open the properties page by right-clicking on it and select Properties.
Select the SNMP Service Properties
- Select the Security Tab.
- Add the community names for the devices from which you would like to receive SNMP data. Specify Community Rights as well.
Set "public" as the Read Community

NOTE: The default read only community for most devices is “public”. The ICONICS SNMP Simulator publishes in this community. The default read/write community for most devices is “private”.
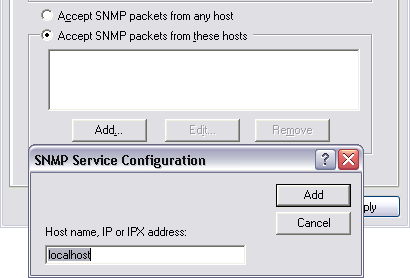
- Add the Host Name or IP addresses of devices you wish to receive SNMP packets from by using the “Add…” button in the lower section. You can also choose to accept SNMP packets from any host.
Add the Host Name or IP Address of SNMP Enabled Devices
- Click on “OK” to close the properties window.
- Restart the SNMP service by selecting it and clicking the restart service button on the top toolbar.
- There is also a SNMP Trap Service in the Services manager. You will need to disable this service.
- Close the services browser.
Configuring the MS Windows SNMP Agent Service: SNMP Simulator Traps
- Go to Start -> Programs -> Control Panel -> Administrative Tools -> Services.
- Select SNMP Service and open the properties page by right-clicking on it and select Properties.
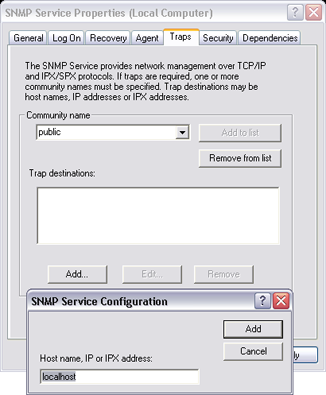
- Click on the Traps Tab.
- Type “public” under community name and click Add to list.
- Click on “Add…” at the bottom of the window and add “localhost” and the DNS name of your PC.
Add "localhost" and the PC's DNS Name
- Click on “OK” to close the properties window.
- Restart the SNMP service by selecting it and clicking the restart service button on the top toolbar.
- Close the services browser.
See also:
Introduction to SNMP and SNMP Connector