[Click Here for more info on Hyper Historian Data Archiver]
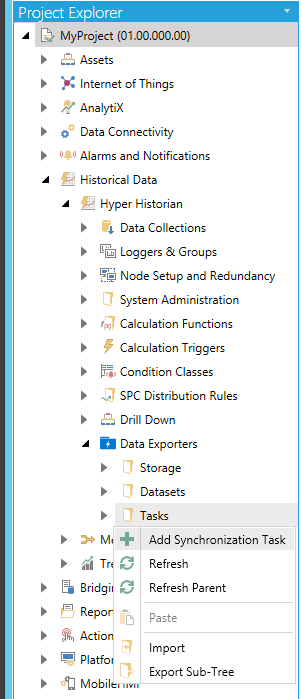
To Add a Synchronization Task:
Add Synchronization Task from Project Explorer

-OR-
Select the Tasks node, then click on the Add Synchronization Task button, shown below, in the Edit section of the Home ribbon in the Workbench.
Add Synchronization Task Button

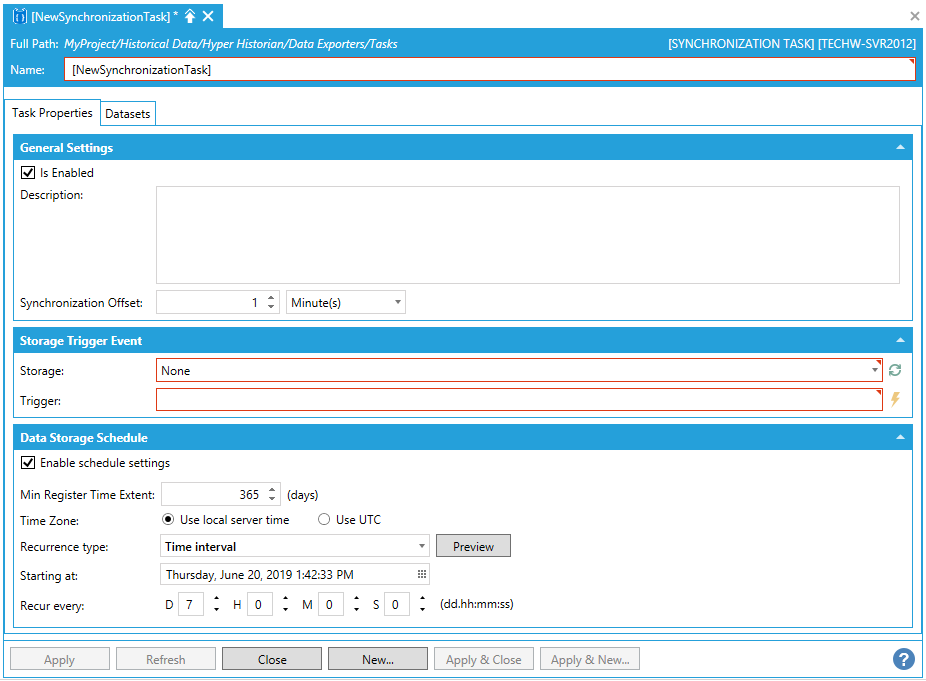
This opens the Synchronization Task properties, as shown below. Enter a Name for the Synchronization Task properties in the text entry field.
Synchronization Task Properties

Task Properties Tab

General Settings
Is Enabled -Enables the synchronization task.
Description -Enter a description of the synchronization task in the text entry field.
Synchronization Offset -Minimal time distance for synchronization data. Enter a number in the text entry field or use the up/down arrow buttons. In the pulldown menu, select from Second(s), Minute(s), Hour(s), or Day(s).
Storage Trigger Event
Storage -Specify the Data Storage where the task should be run. Use the pulldown menu to select from configured Data Storages. Click on the  button to refresh the list.
Trigger -The event raised to execute the task to export data to storage. Enter a trigger in the text entry field or click on the  button to open the Data Browser and navigate to your selected trigger.
Data Storage Schedule
Enable schedule settings -Specify if the time plan (schedule setting) should be used.
Min Register Time Extent -Minimal time extent to keep created output entities for a single task. Enter a number (in days) in the text entry field or use the up/down arrow buttons.
Time Zone -Select between 'Use local server time' or 'Use UTC'.
Recurrence type -Specify the schedule for the data storage organization (new table, new file, etc.). Use the pulldown menu to select from 'One time only', 'Time interval', or 'Specific dates and times'. Clicking the Preview button opens the Recurrence preview window.
Starting at -Enter a starting day, date, and time in the text entry field or click on the  button to open the date/time picker and select your preferred day, date, and time.
Recur every -If 'Time interval' is selected as the Recurrence type, you can set the Days, Hours, Minutes, and Seconds in each text entry field (or use the up/down arrow buttons).
If 'Specific dates and times' is selected as the Recurrence type, you can set more granular properties, such as "Every (specific month)" or "the (specific day) of each month". If you click the Pick specific times checkbox, you can also set a specific Hour, Minute, and/or Second. For any of these settings, you can also click on the  button, which allows for multi-selection.
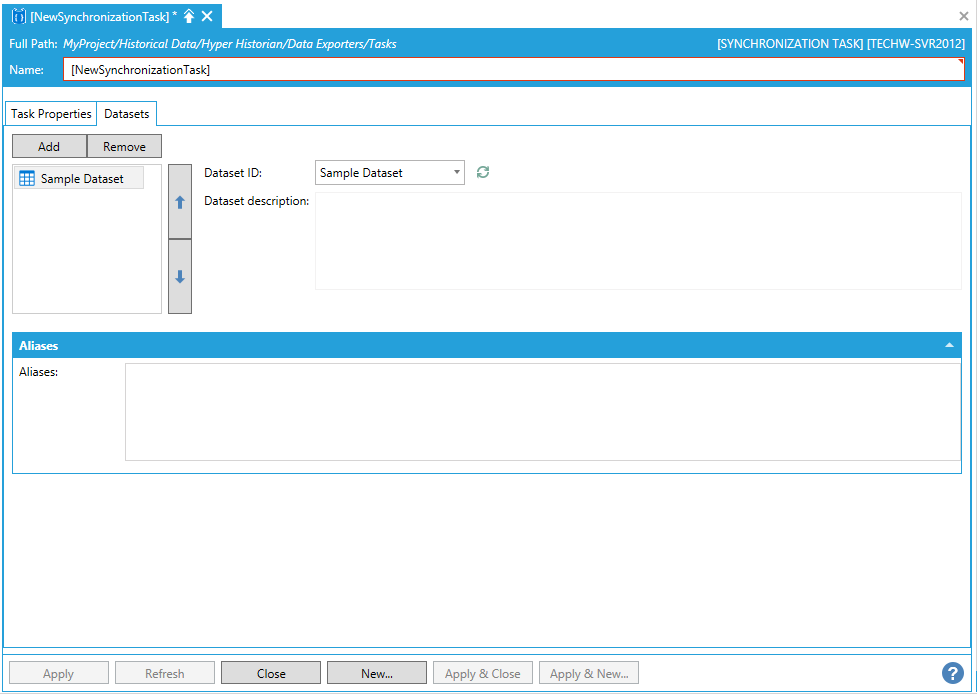
Datasets Tab

The Datasets tab allows you to create a list of Datasets that should be assigned. You can define the order by using the up/down arrows with selected item.
Add - Click this button to add a new Dataset. Once added you can set additional properties on the right side of the window.
Dataset ID - This setting acts as both a text entry field and a pulldown menu. You can enter a Dataset in the text entry field or click on the pulldown menu to select an existing Dataset. You can click on the  button to refresh the list.
Dataset description - Enter a description for the added/selected Dataset in the text entry field.
Remove - Click this button to delete a selected Dataset from the list.
Aliases
Aliases - Specify the Aliases that will be used. Format: Alias Name1 = Alias Vale1; Alias Name2 = Alias Value2.
Click on Apply to save your settings, then Close to return to the Workbench.
See Also: