Once a theme has been defined, the user can define the global aliases that will be associated with that theme, along with the alias values that get used with that theme. A theme, however, is not required for defining a global alias.
Use the Global Aliasing Configurator to create global aliases and assign them the parameters you desire. Alias names can contain aliases themselves, which are resolved during GENESIS64 application runtime. In this section, the most common operations for global aliases are described. When configuring global aliases, first select the database you wish to use and if necessary right click on that database and select the Make Active command from the context menu. Expand the database node to view any aliases or themes you have already created and stored.
Once you have defined your themes, theme values, and global aliases, you can use them, for example, in GraphWorX64, AlarmWorX64, TrendWorX64, and EarthWorX.
You can use folders to organize your aliases, whether or not you decide to organize your aliases into themes. A theme is a logical grouping of aliases used for some purpose, whereas a folder is a physical container.
To Create an Alias Folder:
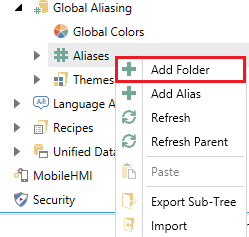
Right-click on the Aliases node and select the new Add Folder command, as shown below.
Add Folder
-OR-
Click on the Aliases node and then on the Add Folder button, shown below, in the Edit section of the Home ribbon in the Workbench.
Add Folder Button

The Folder properties window will appear in the right side of the Workbench. Enter a Folder Name.
Folder Properties
All of the properties other than the name (which much be unique) are optional. For Description, you can opt to Display in Alias Browser. The Use this Display Name property is particularly valuable when the assigned name is long and difficult to enter properly.
Click the Apply button to apply the properties you just defined.
|
|
Note. Data stored in a global aliasing database can be changed by other users. What you see may not be current data. To ensure you are browsing the most up to date data at any time, click the Refresh button or right-click on the item in the tree control and select the Refresh or Refresh Parent command. |
To Create a Global Alias:
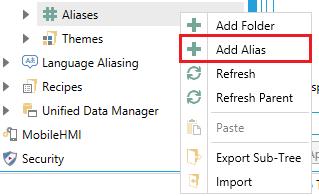
Right-click on the Aliases node (or the alias folder you want to add the alias to) then select Alias, as shown below.
Add Alias
-OR-
Click on the Alias node (or the alias folder you want to add the alias to) then click on the Add Alias button, as shown below, in the Edit section of the Home ribbon in the Workbench.
Add Alias Button

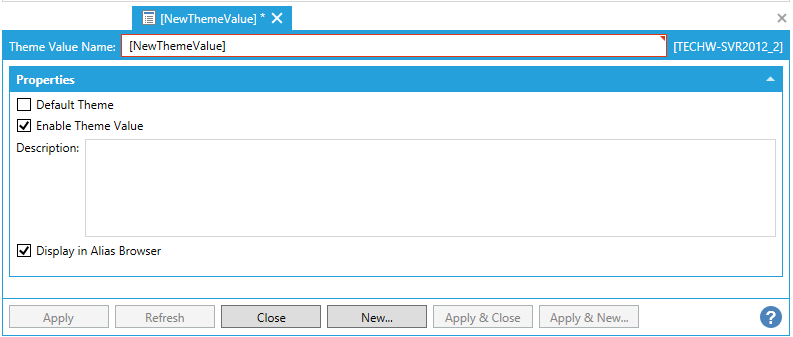
This opens the New Alias properties window in the right side of the Workbench, as shown below. Enter an Alias Name.
Alias Properties Window

Put a check mark in the Enabled Alias Tag check box so that the global alias is resolved at runtime in any GENESIS64 application that references it.
|
|
Note. Of particular importance in the Global Alias Property and the Global Alias Folder Property panes is the Enable check box. You can create a global alias or a folder containing global aliases, but this folder and all its aliases or individual aliases are only available to other programs through the Global Aliasing Server when Enabled is enabled for both the item and folder. |
Enter a Description to help you remember the purpose of the alias into the Description text box, if desired (optional).
Optionally, select a Theme from the dropdown list box. Themes are described in more detail in the topic Working with Themes that follows, and they define a set of a aliases with the same set of properties. Should your selected theme contain connected theme values, they will appear in the Theme Value/Alias Value section at the bottom of the window.
Enter the Default Value into the text entry field, if desired. Or, click on Add File Reference to open a file explorer to browse for your selected default value.
Enable the Display in Alias Browser check box to have your alias appear in the Unified Data Browser control.
The Use this Display Name property is particularly valuable when the assigned name is long and difficult to enter properly.
If you chose a theme in Step 5, the theme's values appear in the Alias Values table at the bottom of the form. For each Theme Value, you can specify the Alias Value to be used. There are a few things you should keep in mind when entering Alias Values:
You can type an alias value in the Alias Value column, or choose a value such as a language alias from the Data Browser
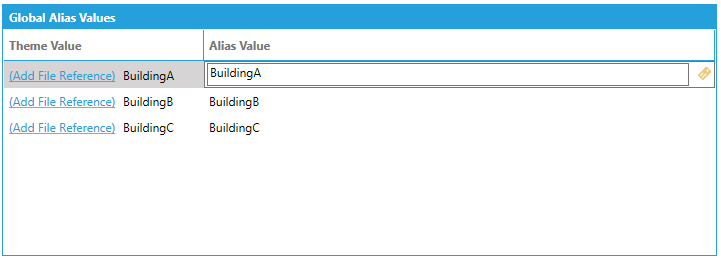
The Alias Value can include text that describes the global alias values being used, as shown in the figure below.
One of the theme values may be the default for the theme.
You can nest a global alias in an alias value, as demonstrated in the figure below. When adding a global alias to the alias value, use the following syntax: <#GlobalAlias#>
Entering Alias Values for Theme Values
Click the Apply button to apply the properties you just defined. The global alias will then appear in the tree control.
To ensure that your alias definitions are up to date, click on the Refresh button or right-click the alias in the tree control and select Refresh.
To be useful, global aliases need to be able to reference one or more values. The more values you define for a global alias, the more useful that global alias becomes in terms of saving you additional work. You create global alias values and assign those global alias values properties such as a default value in the GAS Configurator.
To Edit a Global Alias:
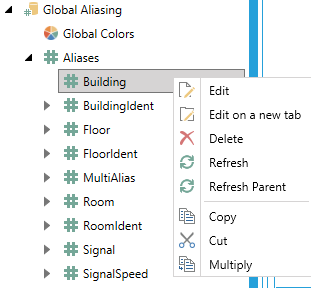
Right-click an alias in the tree explorer then click on either Edit or Edit on a new tab.
Editing an Alias
-OR-
Click on an Alias in the tree explorer then click on the Edit or Edit on a new tab button, shown below, in the Edit section of the Home ribbon in the Workbench.
Edit Buttons
Make your changes in the properties pane as you would for a new Alias; then click the Apply button.
The same right-click menu is also the key to renaming and deleting aliases from the system. Since alias folders, aliases, theme folders, and themes are often used as templates for new aliases and themes, you can use the Copy and Paste function to quickly duplicate your items.
See Also:
Global Aliases Tab on the Data Browser