
The Network Settings node in the FrameWorX provider tree explorer in the Workbench allows users to:
Configure the (Redundant) FrameWorX Servers Connected to the Local FrameWorX Server
Configure the (Redundant) OPC.NET Servers Connected to the Local FrameWorX Server
Configure the (Redundant) OPC UA Servers Connected to the Local FrameWorX Server
To Configure Network Settings:
In the Workbench, expand the Platform Services node and then the FrameWorX node.
Selecting the Network Settings Node in the FrameWorX Provider in the Workbench
Expand the Network Settings node, then continue with your preferred network settings, as described below.
Double-click the FrameWorX Network node.
-OR-
Select FrameWorX Network, then click on the Edit button, shown below, in the Edit section of the Home ribbon in the Workbench.
Edit Button

This opens the FrameWorX Network properties window in the right side of the Workbench as shown below.
FrameWorX Network Properties
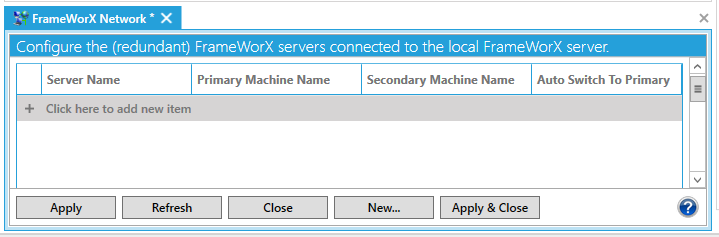
Click on + Click here to add new item. Here, you can enter the Server Name, Primary Machine Name, Secondary Machine Name and set whether or not to Auto Switch to Primary (this is enabled by default).
Click Apply to save your changes, then Close to close the window.
Double-click the GenBroker Network node.
-OR-
Select GenBroker Network, then click on the Edit button, shown below, in the Edit section of the Home ribbon in the Workbench.
Edit Button
This opens the GenBroker Network properties window in the right side of the Workbench, as shown below.
GenBroker Network Properties
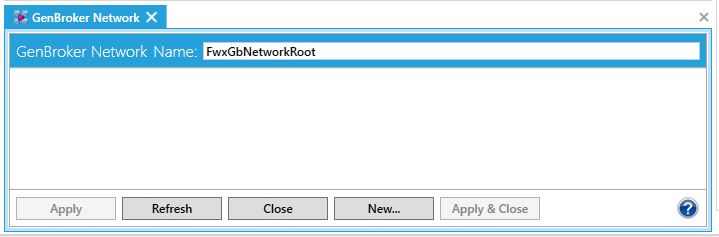
Enter a name in the GenBroker Network Name text entry field. Note that it may already be pre-filled by the current GenBroker Network Name.
Click Apply to save your changes, then Close to close the window.
Double-click the OPC.NET Network node.
-OR-
Select OPC.NET Network, then click on the Edit button, shown below, in the Edit section of the Home ribbon in the Workbench.
Edit Button
This opens the OPC.NET Network properties window in the right side of Workbench, as shown below.
OPC.NET Network Properties

Click on + Click here to add new item. Here, you can enter the Server Name, Primary Endpoint URI, Secondary Endpoint URI, Username and Password.
Click Apply to save your changes, then Close to close the window.
Double-click the OPC UA Network node.
-OR-
Select OPC UA Network, then click on the Edit button, shown below, in the Edit section of the Home ribbon in the Workbench.
Edit Button
This opens the OPC UA Network properties window in the right side of the Workbench, as shown below.
OPC UA Network Properties
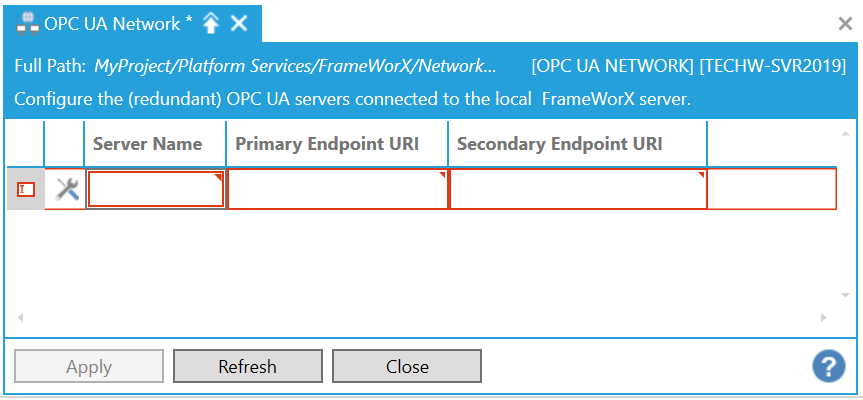
Click on + Click here to add new item. Here, you can enter the Server Name, Primary Endpoint URI, and Secondary Endpoint URI. NOTE: You can also elect to utilize an OPC UA Endpoint URI Security Extension to set intended security properties. Click HERE for more details. Click on the  button to open the Advanced Settings for the selected OPC UA Server. This opens the "Configure OPC UA Advanced settings for..." window.
Click Apply to save your changes, then Close to close the window.
See Also: