This Help topic gives you a quick introduction to some of the new features added to BridgeWorX64 in version 10.96, including:
New Expression Functions for Datasets
Direct Consumption of Alarms and Events
Transaction Hibernation
New JSON Writer Activity
New JSON Content Reader Activity
Version 10.95 of BridgeWorX64 made working with datasets easier by adding the getoutputcell custom expression function, which allowed the user to get a scalar value from a particular cell of a dataset.
Version 10.96 of BridgeWorX64 adds a few more expressions in this vein to make working with datasets easier:
Note: Some of these functions first appeared in 10.95 Update 5.
getoutputrow – Return an array containing scalar values from all columns of specified row.
findoutputrow – Return an array containing scalar values from all columns of the first row that matches a filtering condition (the syntax of rowFilter should be the same as that of ADO.NET DataTable view rows filtering).
findoutputcell – Same as findoutputrow, except returns one particular cell in the row based on an index or column name.
findoutputrowindex – Return an integer index of the first row that matches a filtering condition or (-1) if no matching rows found.
Let's assume we have an activity named myActivity with this as its output:
|
name |
age |
city |
|
John |
30 |
New York |
|
Peter |
94 |
Jalalabad |
|
Mustafa |
47 |
Paris |
These expressions would return these values:
|
Expression |
Result |
|
x=getat(getoutputrow("myActivity", 1), 0) |
Peter |
|
x=getat(findoutputrow("myActivity", "name='Peter'"),2) |
Jalalabad |
|
x=findoutputcell("myActivity", "name='Peter'", "age") |
94 |
|
x=findoutputrowindex("myActivity", "name='Peter'") |
1 |
Transactions can now be triggered directly by alarms and events without requiring the creation of an alarm and event trigger object. Select a transaction and go to the Alarm Sources tab to configure your alarm subscription.
Any event or alarm state change from the configured subscription(s) will trigger a new instance of this transaction. The trigger attributes (usable inside the transaction diagram) are a snapshot of the alarm state at the moment the event occurred.
Transactions can still be triggered by traditional triggers as before.
Transaction hibernation allows transactions to be put to “sleep” if they include a long delay period so that other transactions can be executed, potentially allowing more transactions to be executed in the same span of time.
See Transaction Hibernation for more details.
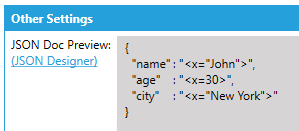
The Generic JSON Writer activity can build a JSON string and write it to a document. Using a simple content designer, the block can write simple scalar nodes, complex object nodes, and array nodes. The values for these nodes can come from previous activities, tags, or expressions.
The Generic JSON Writer block even includes a preview of your JSON.
JSON Doc Preview
The JSON Content Reader activity can take a JSON string and convert it into a standard BridgeWorX64 output dataset to be used in further activities. This can be useful when reading JSONs from external files, web services, databases, or third-party applications.
JSONs can either be parsed as name-value pairs, always returning columns named PropertyName and PropertyValue, or as columns.
When parsing as name-value pairs, you have the option to include array indices, which can be useful if your JSON contains array content.
When parsing as columns, you can choose to match a list of predefined columns by position, or by name. Matching by position is useful if you cannot always guarantee that your JSON items will contain the correct property names.
The JSON Content Reader activity can also output XML, which can be outputted to a file or used in further activities.
For some examples of JSONs and the outputted data set from the JSON Content Reader activity, see "Appendix: JSON Content Reader Example Outputs".
This section will walk you though creating a transaction diagram that will demonstrate the JSON Content Reader.
Note: This example assumes you have basic knowledge of BridgeWorX64. If you need help getting started with BridgeWorX64, see the application note entitled, BridgeWorX64 – Quick Start.
Create a new transaction template.
Add a JSON Content Reader block.
Set the JSON Source Type to Expression.
Select Edit Expression and enter the following expression:
$"{ "name":"John", "age":30, "city":"New York" }"$
Note: You can also use other example JSONs from the "Appendix: JSON Content Reader Example Outputs" section. Make sure to wrap your JSONs in $" "$ notation. This allows you to use regular quotation marks inside the string.
Click OK to the expression editor.
Set the JSON Parse Mode to Parse as Name-Value Pairs.
In the Data Schema section, select (Reset). This will give you the default column names for a name-value pair dataset.
Add a CSV File Output activity.
Configure the JSON Content Reader block to proceed to the CSV File Output block on completion.
Select the CSV File Output block.
Make sure in the Data Input section that Consume data from is set to Previous Activity.
In the CSV File Settings section, use the Edit Expression or Browse Folder links to set the Target File Name to JSONOutput.csv and the Target Folder to be your desktop (or some other location you can easily access).
Configure the CSV File Output block to proceed to End on completion.
Apply your changes, then associate this template with a transaction.
Make sure the BridgeWorX64 Point Manager and Scheduler are running.
Use GraphWorX64 or Data Explorer to write a 1 to the @@Execute tag of your transaction to execute it.
Check your desktop (or whatever folder you chose as your target) for the JSONOutput.csv file. Open it with a text editor or Excel to see the results.
Input:
{ "name":"John", "age":30, "city":"New York" }
Output when using "Match Predefined Columns":
|
name |
age |
city |
|
John |
30 |
New York |
Output when using "Parse as Name-Value Pairs":
|
PropertyName |
PropertyValue |
|
name |
John |
|
age |
30 |
|
city |
New York |
Input:
[ { "name":"John", "age":30, "city":"New York" },
{ "name":"Peter", "age":94, "city":"Jalalabad" },
{ "name":"Mustafa", "age":47, "city":"Paris" } ]
Output when using "Match Predefined Columns":
|
name |
age |
city |
|
John |
30 |
New York |
|
Peter |
94 |
Jalalabad |
|
Mustafa |
47 |
Paris |
Output when using "Parse as Name-Value Pairs" and "Include Array Indices":
|
PropertyName |
PropertyValue |
|
[0].name |
John |
|
[0].age |
30 |
|
[0].city |
New York |
|
[1].name |
Peter |
|
[1].age |
94 |
|
[1].city |
Jalalabad |
|
[2].name |
Mustafa |
|
[2].age |
47 |
|
[2].city |
Paris |
Input:
{ "name":"Order 28",
"sku":20223,
"price":23.95,
"shipTo": { "name":"Jane Smith",
"address":"123 Maple Street",
"city":"Metropolis",
"state":"New York",
"zip":"12345"},
"billTo": { "name":"John Smith",
"address":"123 Maple Street",
"city":"Metropolis",
"state":"New York",
"zip":"12345"}
}
Output when using "Parse as Name-Value Pairs":
|
PropertyName |
PropertyValue |
|
name |
Order 28 |
|
sku |
20223 |
|
price |
23.95 |
|
shipTo.name |
Jane Smith |
|
shipTo.address |
123 Maple Street |
|
shipTo.city |
Metropolis |
|
shipTo.state |
New York |
|
shipTo.zip |
12345 |
|
billTo.name |
Jane Smith |
|
billTo.address |
123 Maple Street |
|
billTo.city |
Metropolis |
|
billTo.state |
New York |
|
billTo.zip |
12345 |
Output when using "Match Predefined Columns":
|
name |
sku |
price |
shipTo.name |
shipTo.address |
shipTo.city |
shipTo.state |
shipTo.zip |
billTo.name |
etc. |
|
Order 28 |
20223 |
23.95 |
Jane Smith |
123 Maple Street |
Metropolis |
New York |
12345 |
John Smith |
etc. |
Input:
{
"name":"Admin",
"age":36,
"rights": [
{"roleName":"admin", "roleIds":[1,2,3]},
{"roleName":"editor", "roleIds":[4,5,6]},
{"roleName":"writer", "roleIds":[7,8,9]}
]
}
Output when using "Match Predefined Columns":
|
name |
age |
rights.roleName |
rights.RoleIDs |
|
Admin |
36 |
admin |
1 |
|
Admin |
36 |
admin |
2 |
|
Admin |
36 |
admin |
3 |
|
Admin |
36 |
editor |
4 |
|
Admin |
36 |
editor |
5 |
|
Admin |
36 |
editor |
6 |
|
Admin |
36 |
writer |
7 |
|
Admin |
36 |
writer |
8 |
|
Admin |
36 |
writer |
9 |
Output when using "Parse as Name-Value Pairs" and "Include Array Indices":
|
PropertyName |
PropertyValue |
|
name |
Admin |
|
age |
36 |
|
rights[0].roleName |
admin |
|
rights[0].roleIds[0] |
1 |
|
rights[0].roleIds[1] |
2 |
|
rights[0].roleIds[2] |
3 |
|
rights[1].roleName |
editor |
|
rights[1].roleIds[0] |
4 |
|
rights[1].roleIds[1] |
5 |
|
rights[1].roleIds[2] |
6 |
|
rights[2].roleName |
writer |
|
rights[2].roleIds[0] |
7 |
|
rights[2].roleIds[1] |
8 |
|
rights[2].roleIds[2] |
9 |
Output when using "Convert to XML":
<ROOT>
<OBJECT name="Admin" age="36">
<rights>
<OBJECT roleName="admin">
<roleIds>
<Integer>1</Integer>
<Integer>2</Integer>
<Integer>3</Integer>
</roleIds>
</OBJECT>
<OBJECT roleName="editor">
<roleIds>
<Integer>4</Integer>
<Integer>5</Integer>
<Integer>6</Integer>
</roleIds>
</OBJECT>
<OBJECT roleName="writer">
<roleIds>
<Integer>7</Integer>
<Integer>8</Integer>
<Integer>9</Integer>
</roleIds>
</OBJECT>
</rights>
</OBJECT>
</ROOT>
See Also: