For each level of Assets within the tree control of the AssetWorX provider in the Workbench, you can add Equipment Properties. These allow you to connect the associated asset to real-time (utilizing multiple data source options) or historical data sources
To Add an Equipment Property to an Existing Equipment Asset in AssetWorX
First, you must have already created an asset. You could assign an equipment property to the top-level 'Assets' node if you wish, but in our example, we are connecting to a sub-branch in the tree, an equipment asset we've named 'Test Asset'.
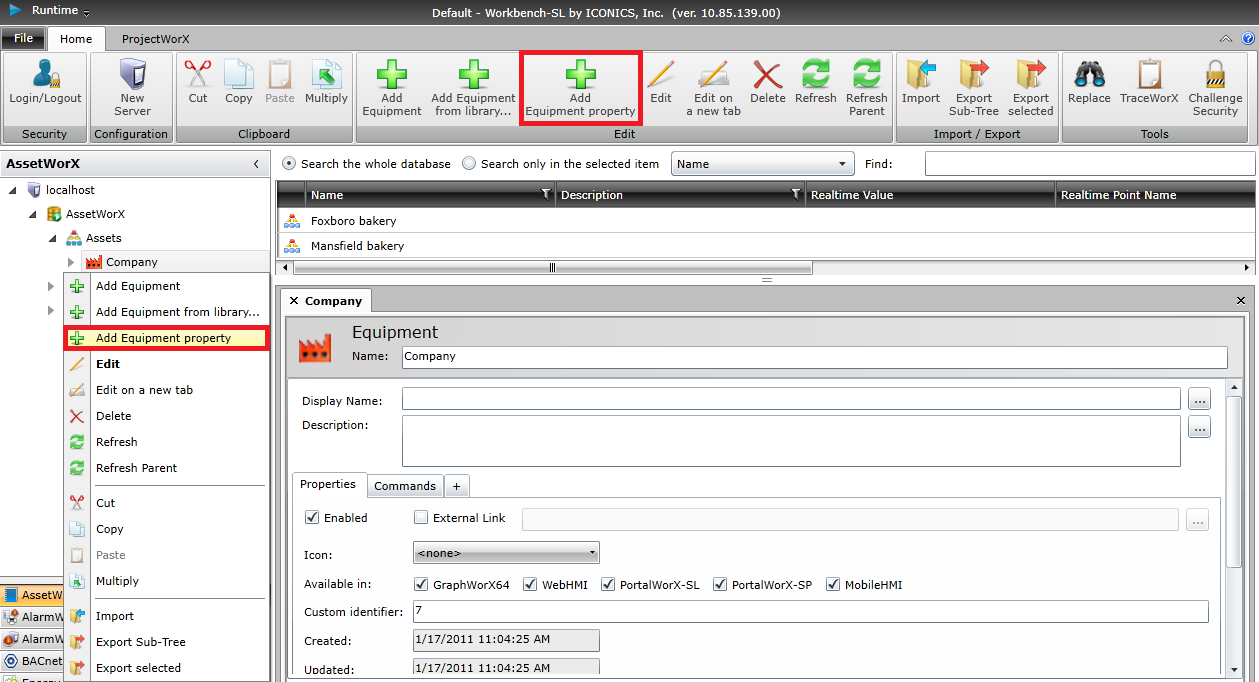
You can add the property by either right-clicking on the equipment in the asset tree and selecting 'Add Equipment property' OR you can click on the item and then, once the contextual ribbon changes to the items relevant to your item selection), click on the 'Add Equipment property' button in the Home ribbon at the top of the screen. Both methods are highlighted in the image below.
'Add Equipment property' in AssetWorX
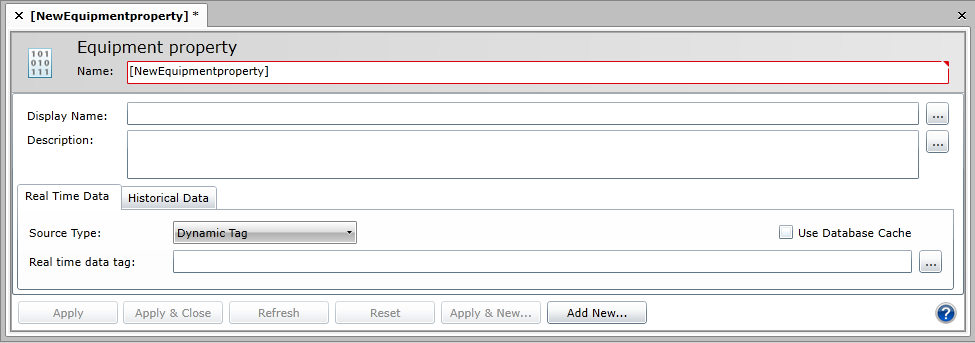
This will open a [NewEquipmentproperty] tab in the right-side window of the Workbench, as well as a placeholder in the top right items list. This items list shows any sub-items connected to an asset, as well as any of its connected properties. Give your property a name and description and then decide whether your property will need to connect to Real Time Data or Historical Data.
Equipment Property Settings in the Workbench
Next, see the following options for selecting either Real Time or Historical Data.
Source Type: None
Real Time Data - Source Type: None
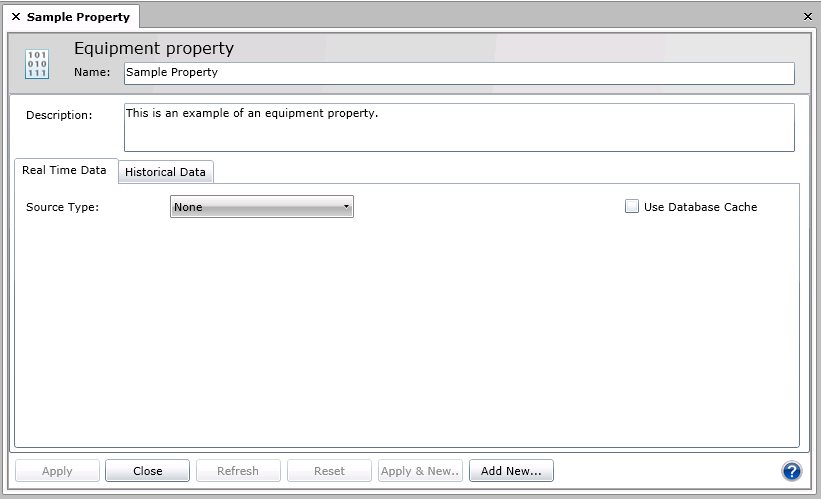
In this instance, you won't require a connection to any Real Time data. You can still decide to use any existing data cached in the database by clicking on the 'Use Database Cache' checkbox.
Source Type: Static Value
Real Time Data - Source Type: Static Value
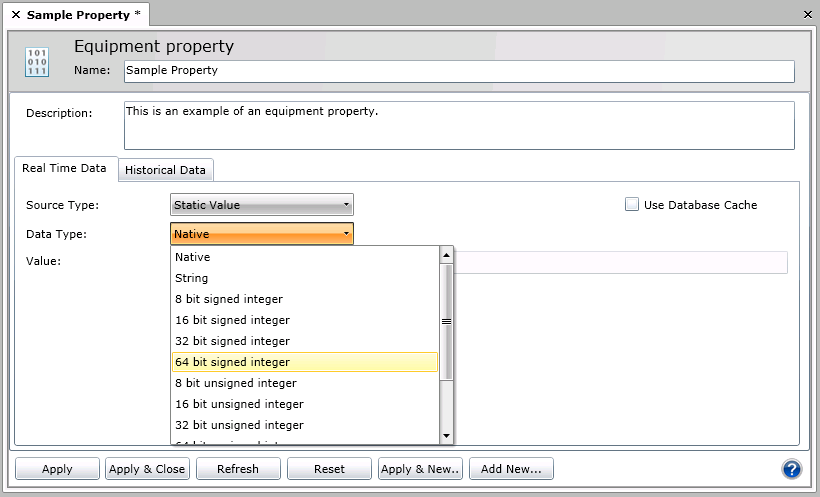
In this instance, once you select 'Static Value' from the pulldown menu, you'll see options to select a 'Data Type' and, depending on that type, be able to enter a Value (in the following text entry field). You can also decide to use any existing data cached in the database by clicking on the 'Use Database Cache' checkbox.
Data Types include:
Native - will prevent you from entering anything in the Value text field.
String
8 bit signed integer
16 bit signed integer
32 bit signed integer
64 bit signed integer
8 bit unsigned integer
16 bit unsigned integer
32 bit unsigned integer
64 bit unsigned integer
32 bit floating point number (single precision)
64 bit floating point number (double precision)
Boolean value
Source Type: Dynamic Tag
Real Time Data - Source Type: Dynamic Tag
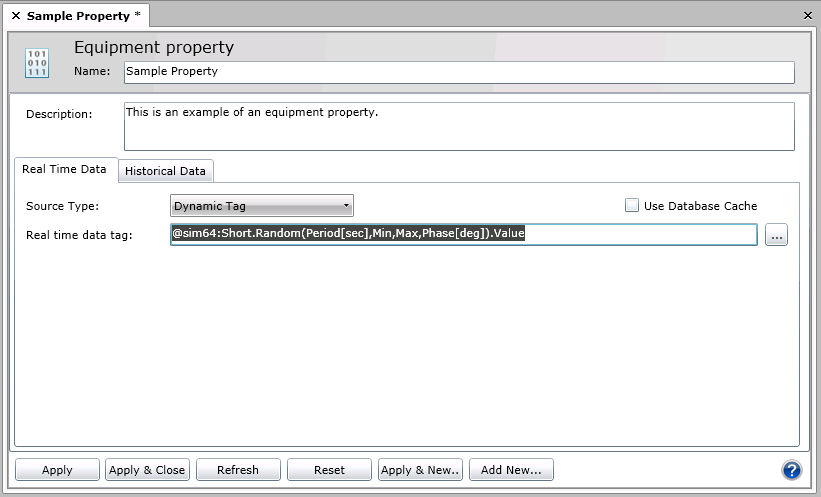
In this instance, once you select 'Dynamic Tag' from the pulldown menu, you'll be able to enter a Real time data tag. If you don't know the exact location, you can click on the ellipsis [...] button to bring up the Data Browser, where you will be able to select from all connected data sources. In the example above, we are using a simulated data value source. You can also decide to use any existing data cached in the database by clicking on the 'Use Database Cache' checkbox.
Source Type: Polled Dynamic Tag
Real Time Data - Source Type: Polled Dynamic Tag
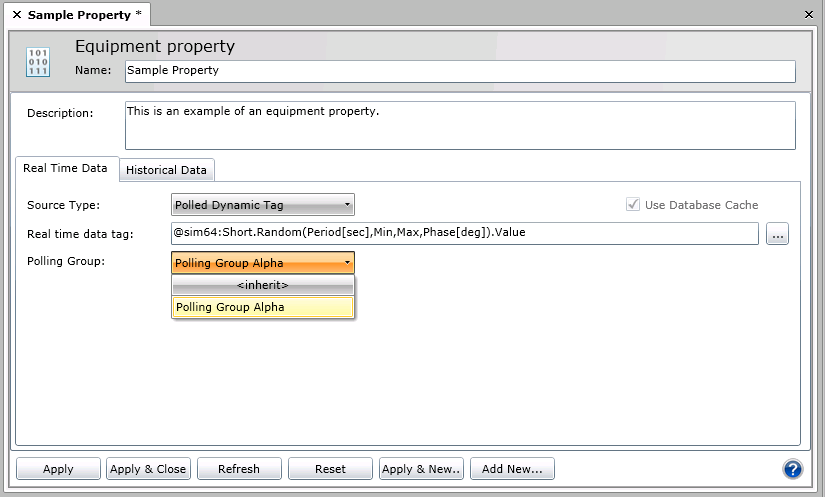
In this instance, once you select 'Polled Dynamic Tag' from the pulldown menu, you'll be able to enter a Real time data tag. In the example above, we are using a simulated data value source.
In comparison to the regular 'Dynamic Tag' option explained above, the Polled Dynamic Tag allows you to set times/recurrences for data retrieval, using a Polling Group. If you don't know the exact location, you can click on the ellipsis [...] button to bring up the Data Browser, where you will be able to select from all connected data sources. The Polling Group pulldown allows you to either <inherit> the polling settings from the higher branches of the asset tree in which this particular equipment asset has been placed OR you can select a Polling Group that has been created through the Polling Groups feature of the AssetWorX provider's System properties (in this example, we are selecting 'Polling Group Alpha').
You can also decide to use any existing data cached in the database by clicking on the 'Use Database Cache' checkbox.
Source Type: Expression
Real Time Data - Source Type: Polled Dynamic Tag
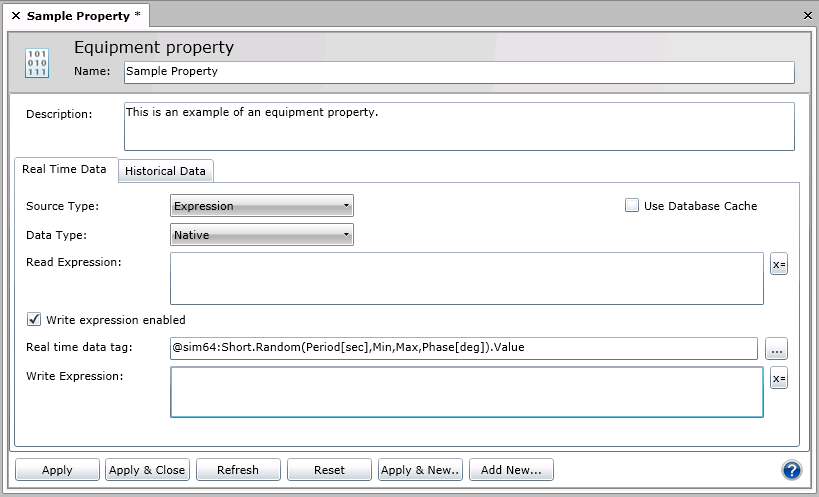
In this instance, once you select 'Expression' from the pulldown menu, you'll see options to select a 'Data Type' and, depending on that type, be able to enter a Value (in the following text entry field). You can also decide to use any existing data cached in the database by clicking on the 'Use Database Cache' checkbox.
Data Types include:
Native - will prevent you from entering anything in the Value text field.
String
8 bit signed integer
16 bit signed integer
32 bit signed integer
64 bit signed integer
8 bit unsigned integer
16 bit unsigned integer
32 bit unsigned integer
64 bit unsigned integer
32 bit floating point number (single precision)
64 bit floating point number (double precision)
Boolean value
Next, you'll be able to either enter a Read Expression directly into the text entry field or click on the [X=] button to open the Expression Editor.
Once you have entered a Read Expression, you have the option of also creating a Write Expression. Click on the 'Write expression enabled' checkbox in order to allow the remaining text entry fields to become active.
You'll be able to enter a Real time data tag. If you don't know the exact location, you can click on the ellipsis [...] button to bring up the Data Browser, where you will be able to select from all connected data sources. In the example above, we are using a simulated data value source.
Next, you'll be able to either enter a Write Expression directly into the text entry field or click on the [X=] button to open the Expression Editor.
Historical Data Tab in the Equipment Property Settings in AssetWorX
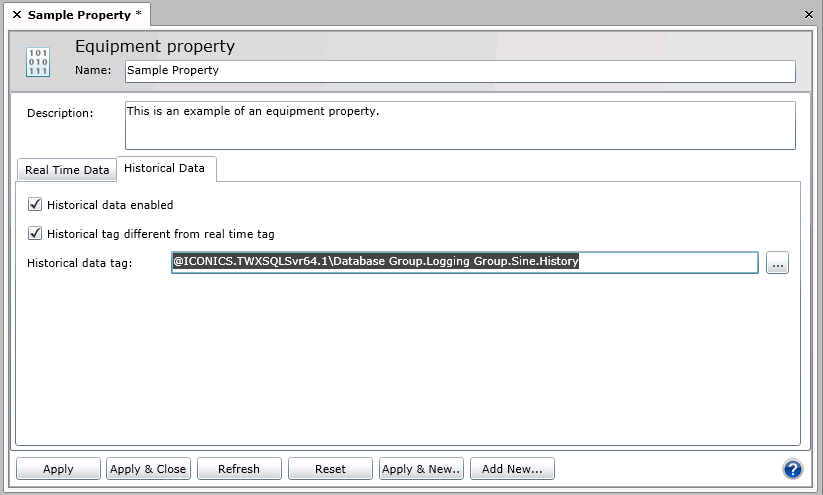
First, if you decide to utilize historical data with your equipment property, click on the checkbox for 'Historical data enabled'.
If you have not already changed settings in the Real Time Data tab, the 'Historical tag different from real time tag' checkbox will be inactive. If you did make changes to the Real Time Data tab, click the checkbox if you wish to use a different data tag. In the example above, we have used a simulated historical tag. You'll then be able to enter a Historical data tag. If you don't know the exact location, you can click on the ellipsis [...] button to bring up the Data Browser, where you will be able to select from all connected data sources. In the example above, we are using a simulated data value source.
See Also:
Adding Equipment to the Asset Tree