Remote Expert Mode is a way to connect technicians in the field to experts in the office. The technician can use a device such as a RealWear HMT-1 headset, a phone, tablet, or any other supported mobile device to initiate a video call to the office. The technician can use the video to show the expert the problem, and the expert can annotate video stills to instruct the technician of the correct steps to take to resolve it.
In order to have a fully working remote expert mode, including camera and audio features, you need to get a wildcard certificate and use it in IIS. This cannot be a self-signed certificate.
Contact your IT department to have the certificate generated, and then install it on the server machine using the steps below.
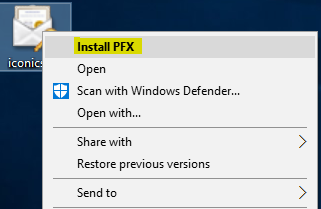
Right-click on the certificate and select Install PFX.
Figure 1 – Installing Wildcard Certificate
For Store location, choose Local Machine.
Continue through the rest of the certificate activation dialogs.
After certificate is successfully imported, open Internet Information Services (IIS) Manager.
Select Sites > Default Web Site.
In the right pane select Bindings.
Select Add.
For Type, select HTTPS.
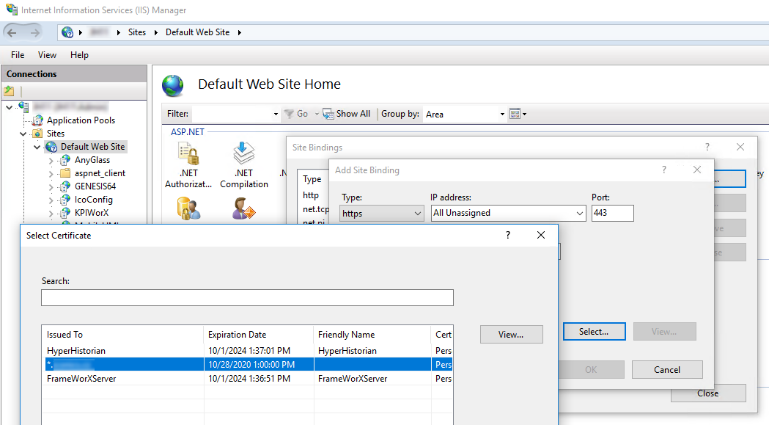
Select the Select button, then browse for your certificate.
Figure 2 – Setting Up IIS with Wildcard Certificate
Select OK twice, then close the Site Bindings dialog.
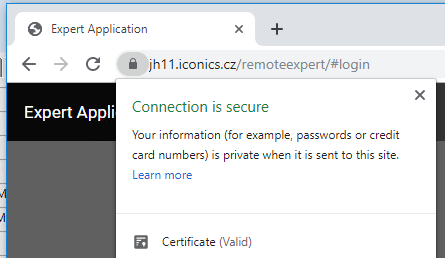
Now you should be able to access following pages without any certificate error and with a secure connection. If needed, you can use the fully qualified domain name.
https://server_name/remoteexpert
https://server_name/remoteexpert/tech
Figure 3 – Correctly Installed Certificate
When your devices and servers are all on the same network you don’t need any additional settings in terms of calling an expert and accepting technician calls.
Remote expert mode is connected to ICONICS security. Security must be enabled, and several users configured.
On the server, browse to the expert dashboard at: https://server_name/remoteexpert
Log in using an ICONICS username and password.
Figure 4 – Expert Login Page
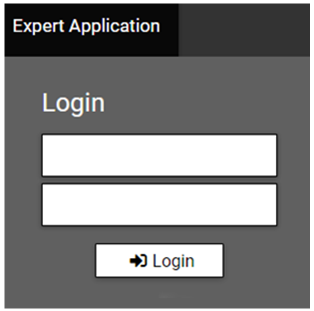
At this point, the application will mostly be a blank gray page. The expert will now wait for incoming calls.
On the technician's device, browse to the technician page at: https://server_name/remoteexpert/tech
You will see names of experts logged in to expert application.
Figure 5 – List of Available Experts
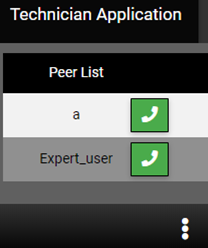
Press the green phone button next to the expert you would like to call.
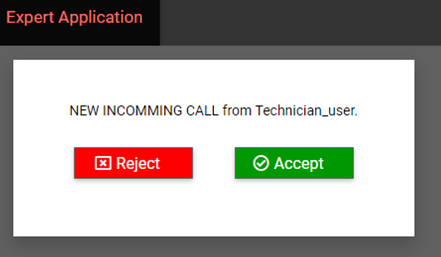
On the expert's page, an incoming call will appear. Select Accept.
Figure 6 – Incoming Call from Technician
After the expert accepts the call, the audio and video stream will start between expert and technician.
Figure 7 - Expert's View of Call in Progress

The buttons at the bottom of the screen allow the user to mute microphone, hang-up, hide the video, and annotate screen.
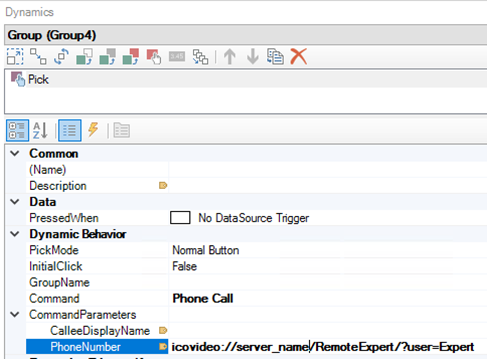
The Call Expert action can also be triggered from a GraphWorX64 display.
Add a Phone Call pick action to a display. For Phone number, use the following, replacing server_name with the appropriate machine name or fully qualified domain name, and Expert_User with the ICONICS username of the expert to be called.
icovideo://server_name/RemoteExpert/?user=Expert_user
Figure 8 – Phone Call Pick Action to Call an Expert
The technician using GraphWorX64 or MobileHMI can trigger this pick action to launch the expert video call in a browser.
Note that in this mode, the technician doesn’t have any additional settings available like mute microphone, etc. The call is under the control of the expert.
This calling method is designed for technicians who are using a RealWear or other wearable device and using handsfree voice commanding. See Client-Side Speech Recognition, for information on setting up voice-controlled pick actions.
The previous steps assumed the remote expert and technicians were on the same network. If the expert and technicians are on different networks, additional settings are needed.
A TURN server and ICE server must be configured to allow remote expert calls across networks. A TURN server is a network entity running in the cloud that relays media for VoIP-related protocols. The technician device making the call will be instructed to use the TURN server to contact the expert's device.
The following steps will guide the user to creating a TURN server and configuring ICE within IIS. Note that the steps contain instructions for the Azure Portal, which may change as Microsoft releases updates. If you cannot find a setting, consult Azure Portal documentation.
Launch the Azure Portal.
Select Container instances.
In the overview of Container Services, select Add.
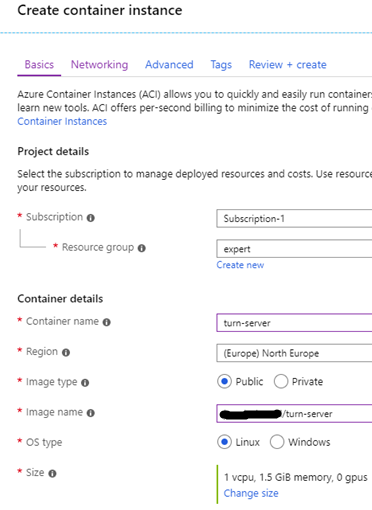
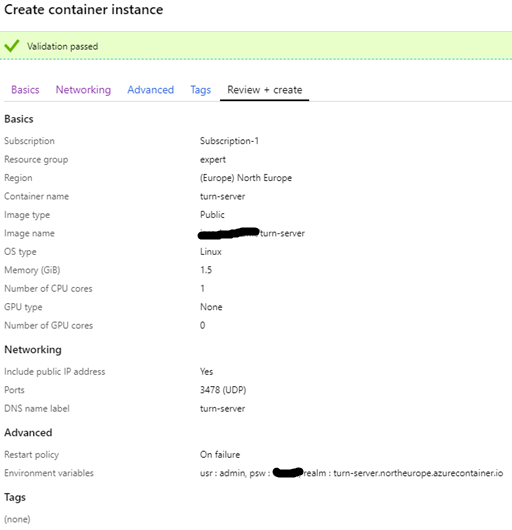
In the Create container instance wizard, choose settings similar to Figure 10. In particular, fill in the Resource group, Container name (part of URI), and Image name (name/turn-server).
Figure 10 – TURN Server Basics Settings
Select Next: Networking.
Add a UDP port 3478 and set the DNS name label.
Figure 11 – TURN Server Networking Settings

Select Next: Advanced.
Set up environment variables as follows:
usr: The username to access the turn server
psw: The password to access the turn server
realm: The hostname to access the turn server (same as in the previous page)
Figure 12 – TURN Server Advanced Settings

Select Next.
Double-check the values in the overview.
Figure 13 – TURN Server Review + Create
Select Create and wait for the instance to start.
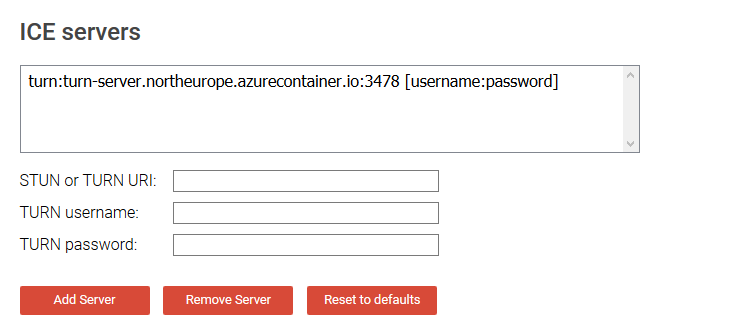
Go to the Trickle ICE site at: https://webrtc.github.io/samples/src/content/peerconnection/trickle-ice/
Add your server as shown in Figure 14.
Figure 14 – Trickle ICE
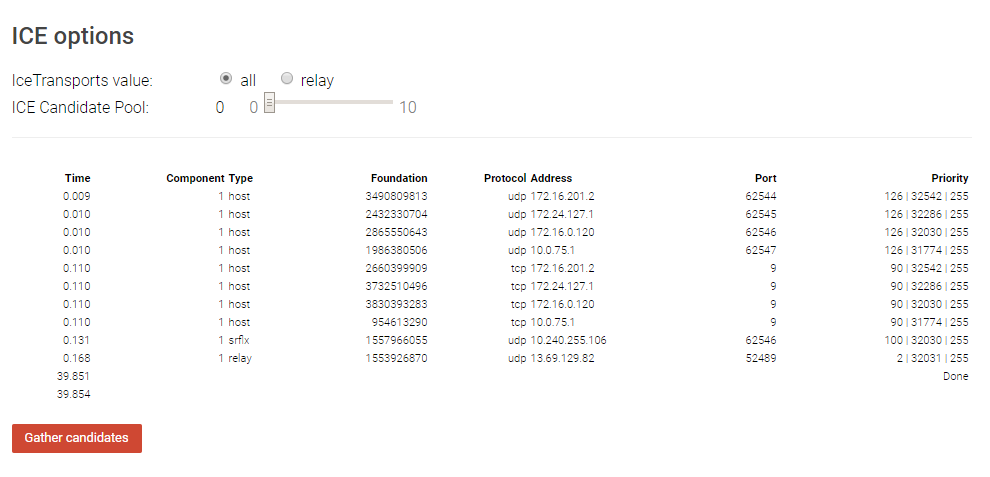
Select Gather candidates.
You should see output similar to Figure 15. If you see a row with Component Type of Relay, that indicates a successful test.
Figure 15 – Test Running Instance
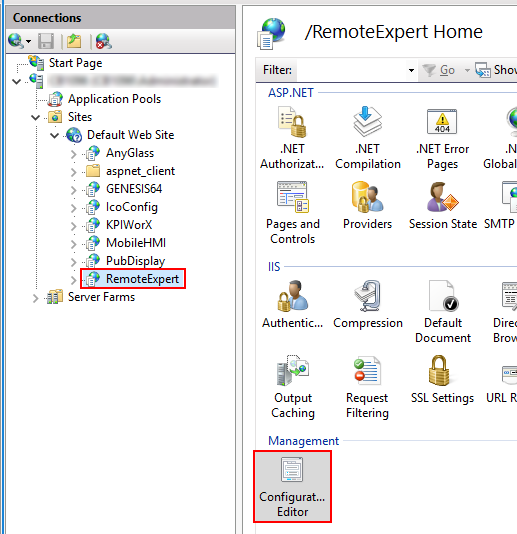
On the GENESIS64 server, the ICE servers for RemoteExpert should be configured in IIS manager.
Open IIS Manager.
Expand Sites > Default Web Site.
Select RemoteExpert.
In the Management section, open Configuration Editor.
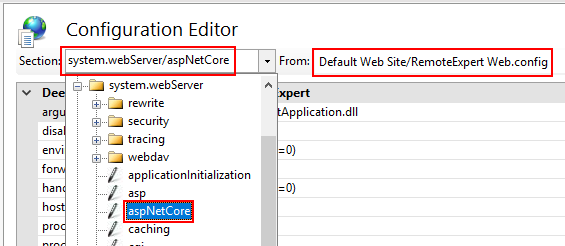
Figure 16 – RemoteExpert > Configuration Editor
For Section, select system.webServer/aspNetCore.
For From, make sure web.config is selected.
Figure 17 – Configuration Editor Dropdowns
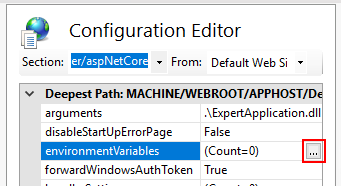
Find environmentVariables and select the ellipsis (…) button.
Figure 18 - Selecting Environment Variables
In the Collection Editor, select Add.
For Name, type APPSETTING_ice-servers.
For Value, enter a JSON with the information for your ICE server. See the examples below:
Single TURN server:
[{"urls":["turn:name.location.azurecontainer.io:portNumber"],"username":"user","credential":"password"}]
Multiple TURN servers:
[{"urls":["turn:name.location.azurecontainer.io:portNumber","turn:additionalName.location.azurecontainer.io:portNumber"],"username":"user","credential":"password"}]
See Also:
Client-side Speech Recognition