
GraphWorX64 version 10.95 and later support import of 3D models form Revit via IFC or FBX format. This Help topic describes steps needed to import model into GraphWorX64.
Exporting IFC
To export existing Revit project into IFC file format follow these steps. Exporting to an IFC file is preferred because it is a natively supported format in GraphWorX64.
Open your model/project in Revit.
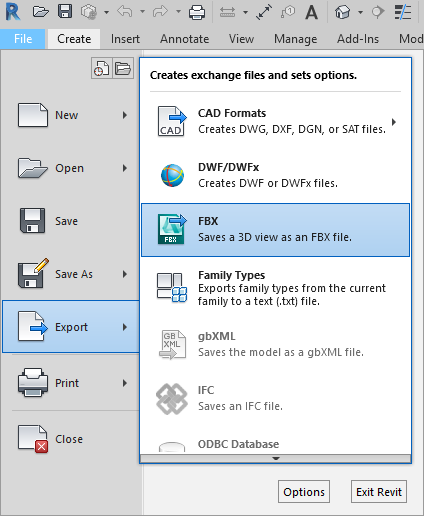
Go to File > Export > IFC.
Figure 1 - Export to IFC in Revit
NOTE: If the IFC option is disabled, please follow instructions in the "Exporting FBX" section.
The Export IFC dialog will appear.
Figure 2 - Export IFC Dialog
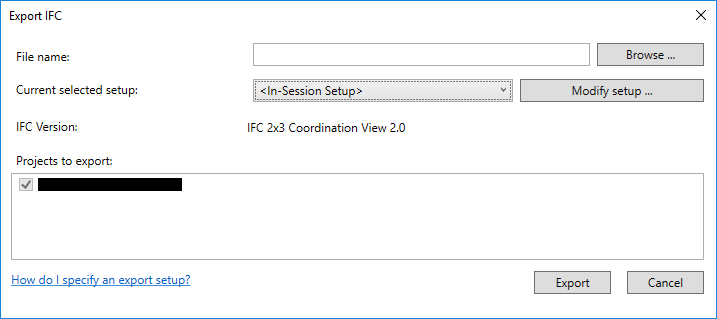
Click on Browse… and specify the location and name of the IFC file.
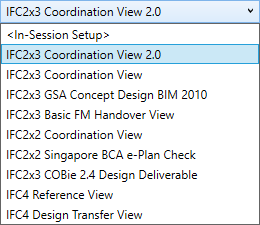
From the Current selected setup dropdown menu, select IFC2x3 (preferably IFC2x3 Coordination View 2.0).
Figure 3 - IFC Version Options
Under Projects to export, select the project(s) you want export.
NOTE: All projects opened in Revit appears in this list.
Select Export.
NOTE: You can check the progress of the export in the bottom left corner of the Revit window.
Follow these steps if you have no option to export your project to IFC.
Open your model/project in Revit
Go to File > Export > FBX.
Figure 4 - Export to FBX in Revit
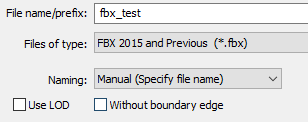
3. Specify the location and name of your FBX file. Keep the other settings at the defaults.
Figure 5 - FBX Export Options
Select Save.
If you had to export an FBX file, the FBX format is not directly supported by GraphWorX64. However, you can use a use third party 3D tools to convert your model from FBX to one of GraphWorX64's supported formats, preferably OBJ or COLLADA.
If you had exported an IFC file, you can skip this section.
Blender is a free and open source 3D creation suite. It supports the entirety of the 3D pipeline—modeling, rigging, animation, simulation, rendering, compositing and motion tracking, even video editing and game creation.
Download and install latest Blender from www.blender.org.
NOTE: You can access the Blender reference manual at: https://docs.blender.org/manual/en/latest/
Open Blender.
The 3D viewport contains a camera, cube, and light by default. We need to delete these:
Use the A key to select all objects.
Hit the DELETE key to delete the selected objects.
Go to File > Import > FBX (.fbx).
Figure 6 - FBX Import in Blender
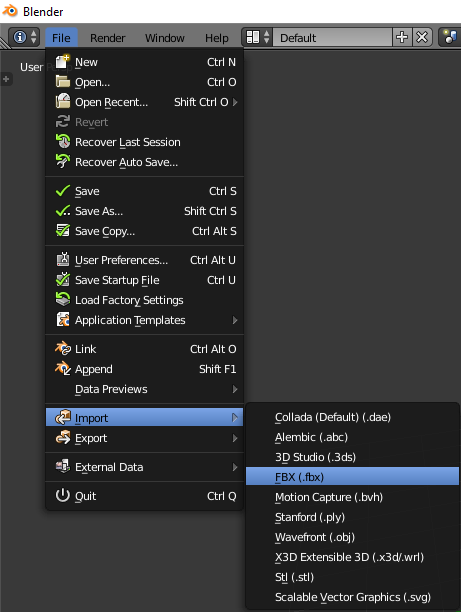
Browse to your FBX file and select Import FBX.
Your model will appear in the 3D viewport.
Go to File > Export > Wavefront (.obj) or Collada (Default) (.dae).
Specify a location and file name.
Use the following export options, depending on your file type:
Figure 7 - Export Options for OBJ (left) and COLLADA (right)
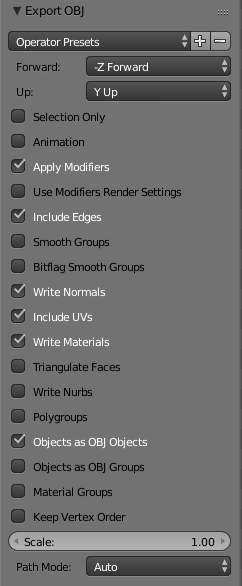
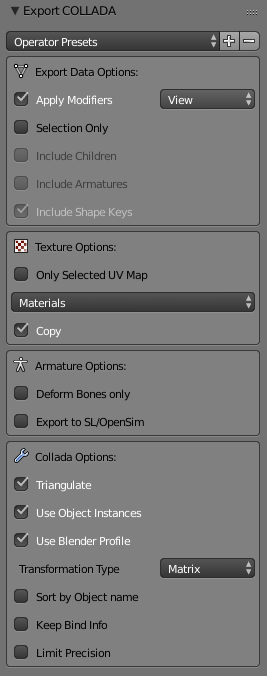
Select Export.
Open GraphWorX64.
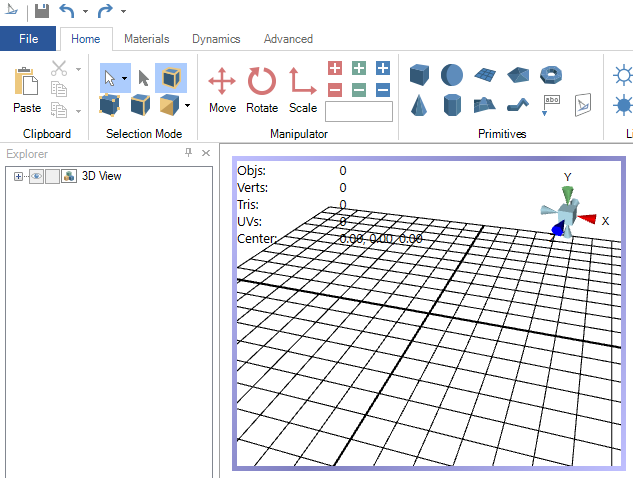
Add a 3D View into canvas.
Figure 8 - 3D View in Display
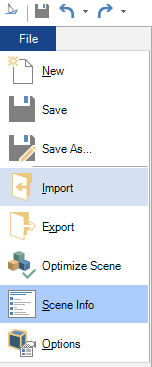
3. With the 3D Viewer selected, go to File > Import.
Figure 9 - 3D View Import
4. Browse for your file and select Open.
5. The Import Options dialog will appear.
Figure 10 – Import Options Dialog for IFC/XBIM Files
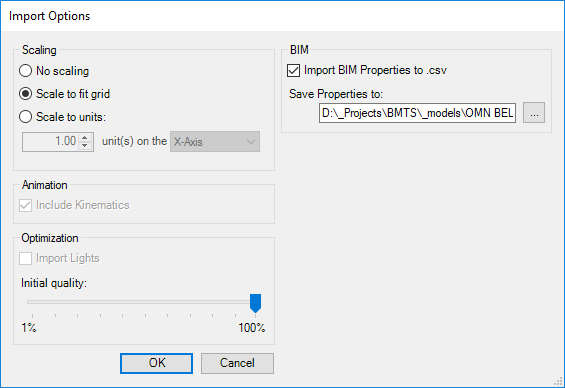
Figure 11 – Import Options Dialog for OBJ and COLLADA Files
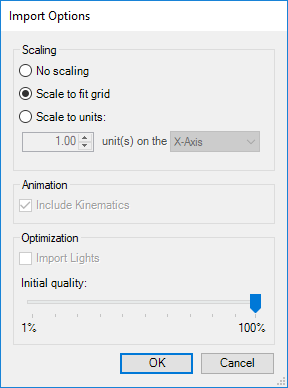
Select one of these Scaling options:
No scaling – keep size of model as in original file
NOTE: Be careful if you select this option. Your model can be very large or out of your view after import.
Scale to fit grid – resize model to fit into 3D View black grid (20x20)
Scale to units – custom scale of model
7Optionally specify an Initial quality.
NOTE: Polygon reduction works best with curved surfaces. Blocky models may lose significant detail.
For IFC files, if desired, check Import BIM Properties to .csv. This will create a CSV file you can use to import your metadata and structure into AssetWorX.
Select OK to begin the import. When it finishes, your model will be in GraphWorX64.
See Also: