Once you have added a network through the Networks node or are configuring devices within the Default Network, you can then perform an auto-discovery of EtherNet/IP devices within that network.
To Explore a Network for EtherNet/IP Devices
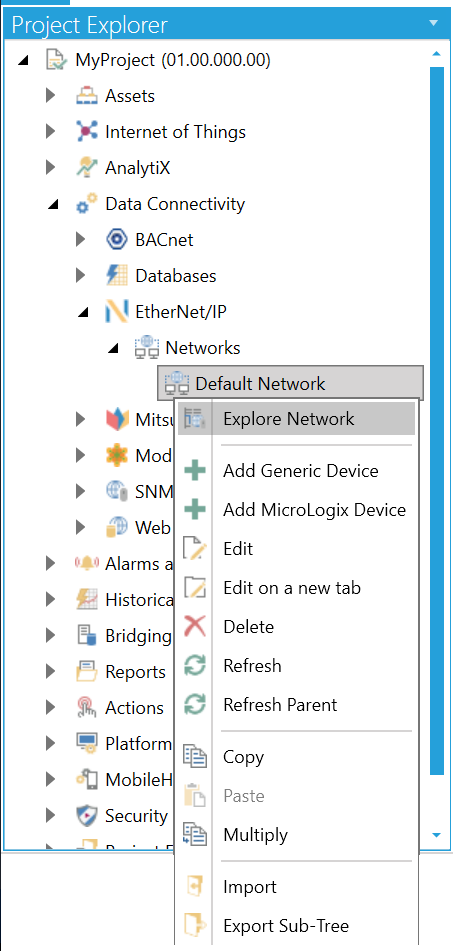
Open the Workbench then expand your project in the Project Explorer, then the Data Connectivity node, and then the Ethernet/IP node and then the Networks node. Right-click on your selected network, then click Explore Network, as shown below.
Explore Network from the Project Explorer in the Workbench

-OR-
Select the network in the Project Explorer then click on the Explore Network button, shown below, in the Tools section of the Home ribbon in the Workbench.
Explore Network Button

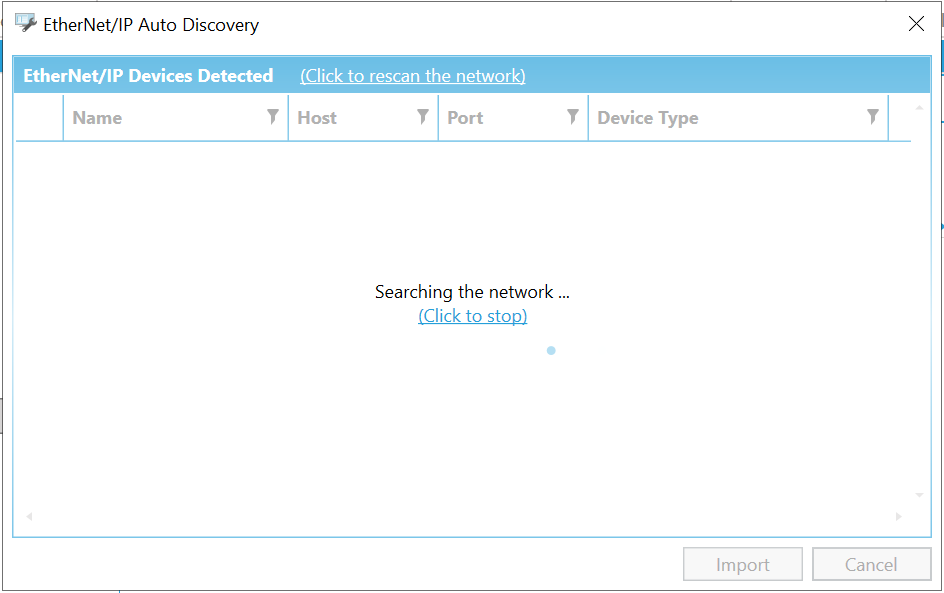
This opens the EtherNet/IP Auto Discovery window, shown below. The selected network will be searched for any EtherNet/IP devices, which will be shown in the EtherNet/IP Devices Detected section of the window, along with each device's Name, Host, Port, and Device Type. You can opt to perform the auto-discovery again via the (Click to rescan the network) link at the the top of the window. You can also stop the auto-discovery process by clicking on the (Click to stop) link in the middle of the window while the process is occurring. When the scan has completed and if any devices have been discovered, you can click on the Import button to import the selected devices into the EtherNet/IP Manager, where they will then be shown (beneath the selected network node) in the Project Explorer in the Workbench.
EtherNet/IP Auto Discovery

See Also: