
The Database Management section of the Project ribbon in the Workbench allows users to perform a number of database-related actions.
Database Management Section of the Project Ribbon in the Workbench
Click on Configure Database to install application configurations in a database. This opens the Install application configuration in a database window, shown below.
Install applications configuration in a database Window
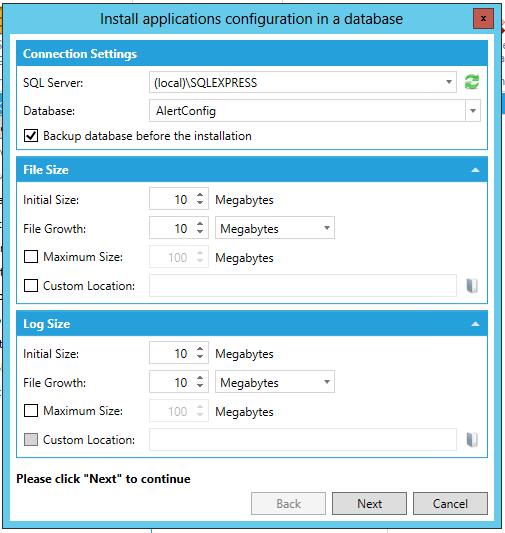
In the Connection Settings section of the window, select the SQL Server and Database from the pulldown menus. You can also opt to Backup (the) database before the installation.
You can opt to expand the File Size section of the window and then set the database's Initial Size (in megabytes), File Growth (in either megabytes or percentage) and (optionally) Maximum Size (in megabytes). In addition, you can also set a Custom Location for the database. If selected, you can then enter a location in the text entry field or click on the  button to set your preferred location.
Next, you can also opt to provide the same information for Log Size, including an optional Custom Location for the log file.
Click Next to continue. You will then see the following secondary options.
Secondary Options Within the Install applications configuration in a database Window
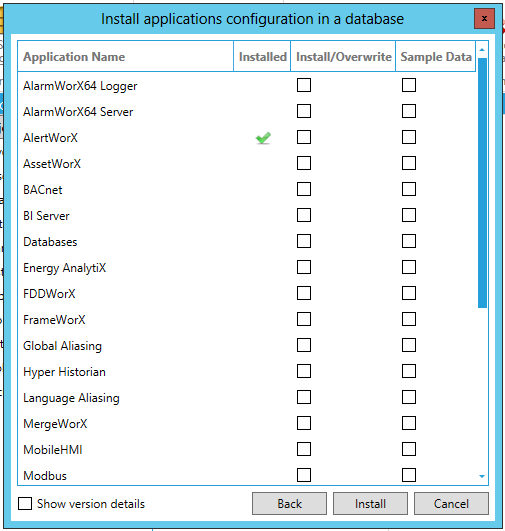
You can decide which of the listed applications (via their Application Names) that you would like to Install/Overwrite within your newly configured database or if you would like to include Sample Data within those applications.
Clicking the Show version details checkbox provides additional info, including Supported Version, and Current Version.
Click Install to complete your selected database configuration.
Upgrade one or more applications Window
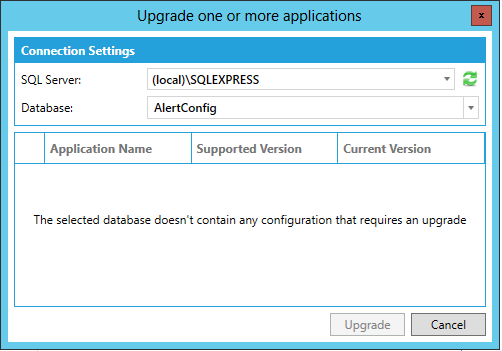
In the Connection Settings section of the window, use the pulldown menus to select your SQL Server and the Database to upgrade.
If your selected items require upgrades, you will see the information (Application Name, Supported Version and Current Version) in the bottom of the window.
Click on Upgrade to complete the process.
Attach a database Window
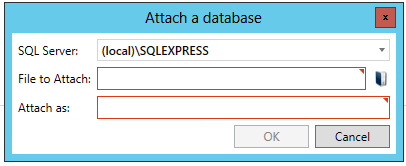
Use the top pulldown menu to select your SQL Server.
Enter a file name to attach or click on the  button to open a file browser to locate your preferred database file.
Once you have selected your database file to attach, you can provide a name for it, in the Attach as text entry field, as you want it to appear in the Workbench.
Click OK to complete the process.
Remove or Detach a database Window
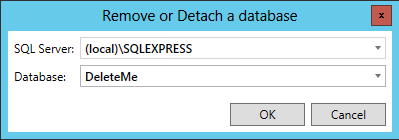
Use the pulldown menus to select the SQL Server and the Database that you wish to delete.
Click OK to complete the process.
Remove or Detach a database Window
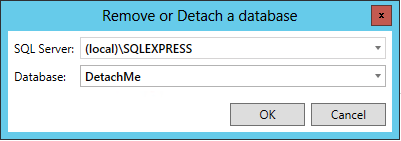
Use the pulldown menus to select the SQL Server and the Database that you wish to detach.
Click OK to complete the process.
Backup a database Window
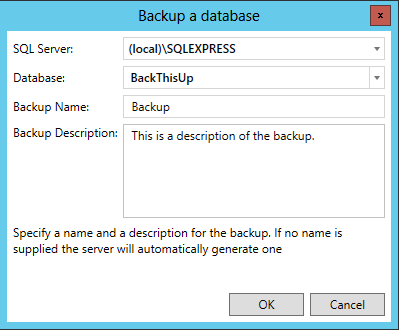
Use pulldown menus to select the SQL Server and the Database that you wish to back up.
Next, you can provide a Backup Name in the text entry field.
Then, you can provide a Backup Description in the last text entry field. Note that if you do not specify a Backup Name and Backup Description, the server will automatically generate this information.
Click OK to complete the process.
Restore a database Window
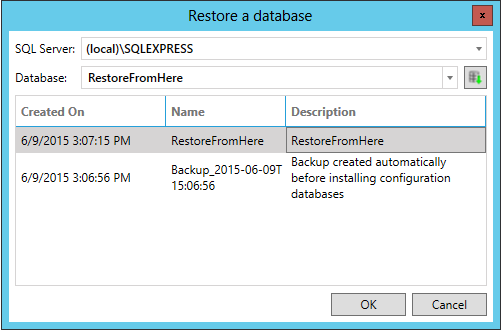
 button, in order to download the database's restore points. This will automatically populate the section below in the Created On, Name and Description fields.
See Also: