The Configurator offers the flexibility of importing data from a text (.txt) file or a Microsoft Excel (.csv) file to your configuration database.
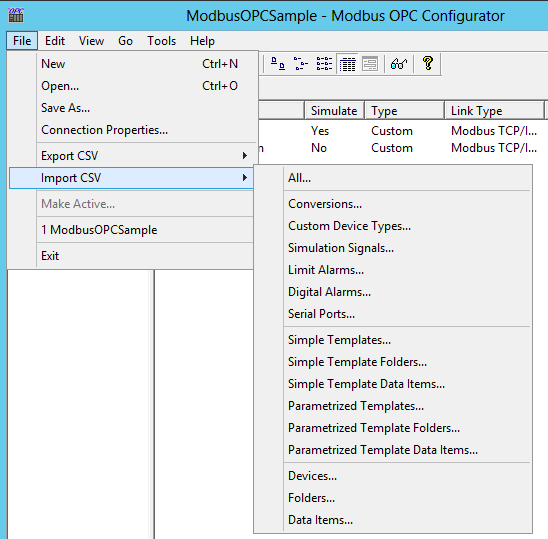
To Import Data into the Modbus OPC Server Configurator:
Import CSV

If you wish to import data from a CSV file to the connected database, you could also click on the Import All Data button [ ] in the standard toolbar in the top left of the configurator.
You will then be presented with options for the type of data you wish to import, including:
All
Conversions
Custom Device Types
Simulation Signals
Limit Alarms
Digital Alarms
Serial Ports
Simple Templates
Simple Template Folders
Simple Template Data Items
Parameterized Templates
Parameterized Template Folders
Parameterized Template Data Items
Devices
Folders
Data Items
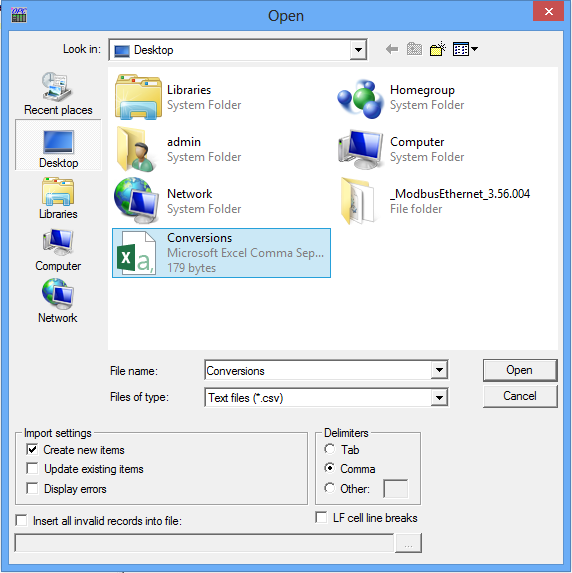
Once you make your selection of the type of data to import, you will see the Open window, shown below.
Import Open Options

Use the top portion of the window to navigate to the location of your selected exported file data.
You can also enter a File name to more quickly locate the exported data.
In the Files of type field, choose the file type (.txt or .csv) that you would like to find.
You can choose from the following import settings:
Create new items. When the import file contains items that are not yet in the configuration database, then it creates them. Otherwise it skips these items.
Update existing items. When the import file contains items that are in the configuration database, then it updates them using data from the import file. Otherwise it skips these items.
Note: Either Create new items or Update existing items must be selected. Otherwise there is nothing to import.
Display errors. When this item is checked, the Configurator shows a dialog box if an error occurs, and then asks you if you want to proceed with the import. When it is not checked, it skips all items where an error occurred.
You can also opt to Insert all invalid records into file (via checkbox). If checked, this activates the text entry field at the bottom of the windows, where you can then enter a file location or click on the ellipsis button [...] to open an additional file explorer where you can select a location and file type (.csv or .txt) for the invalid records file.
Unless you specify Delimiters (Tab, Comma or Other), the file uses Commas by default. You can also opt to use LF cell line breaks via checkbox.
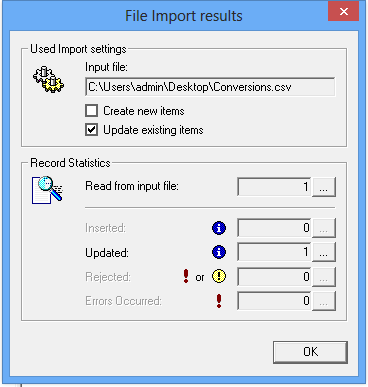
When you have selected a file to import, click Open. When the import is completed, the File Import results dialog box opens, as shown below. This shows the Used Import settings, including the Input file name. It also provides a summary of the import, including how many items were inserted, updated, or rejected, and shows how many errors occurred
File Import results

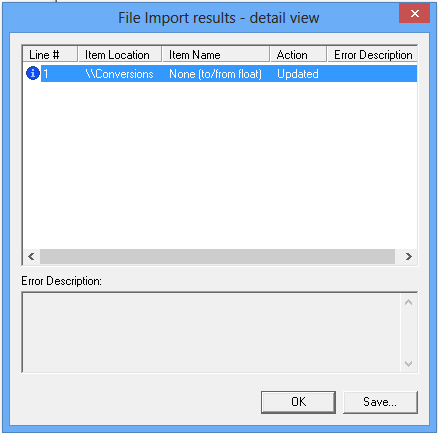
In the Record Statistics section, you can click on the ellipsis button [...] to the right of any field to see a File Import results - detail view, as shown below. This view shows the specific items that were inserted, updated, or rejected, as well as a description of any errors that occurred.
File Import results - detail view

Click OK to close any of the open import-related windows and return to the main configurator window.
See Also: